How to Patch a Leaking Aluminum Shed Roof
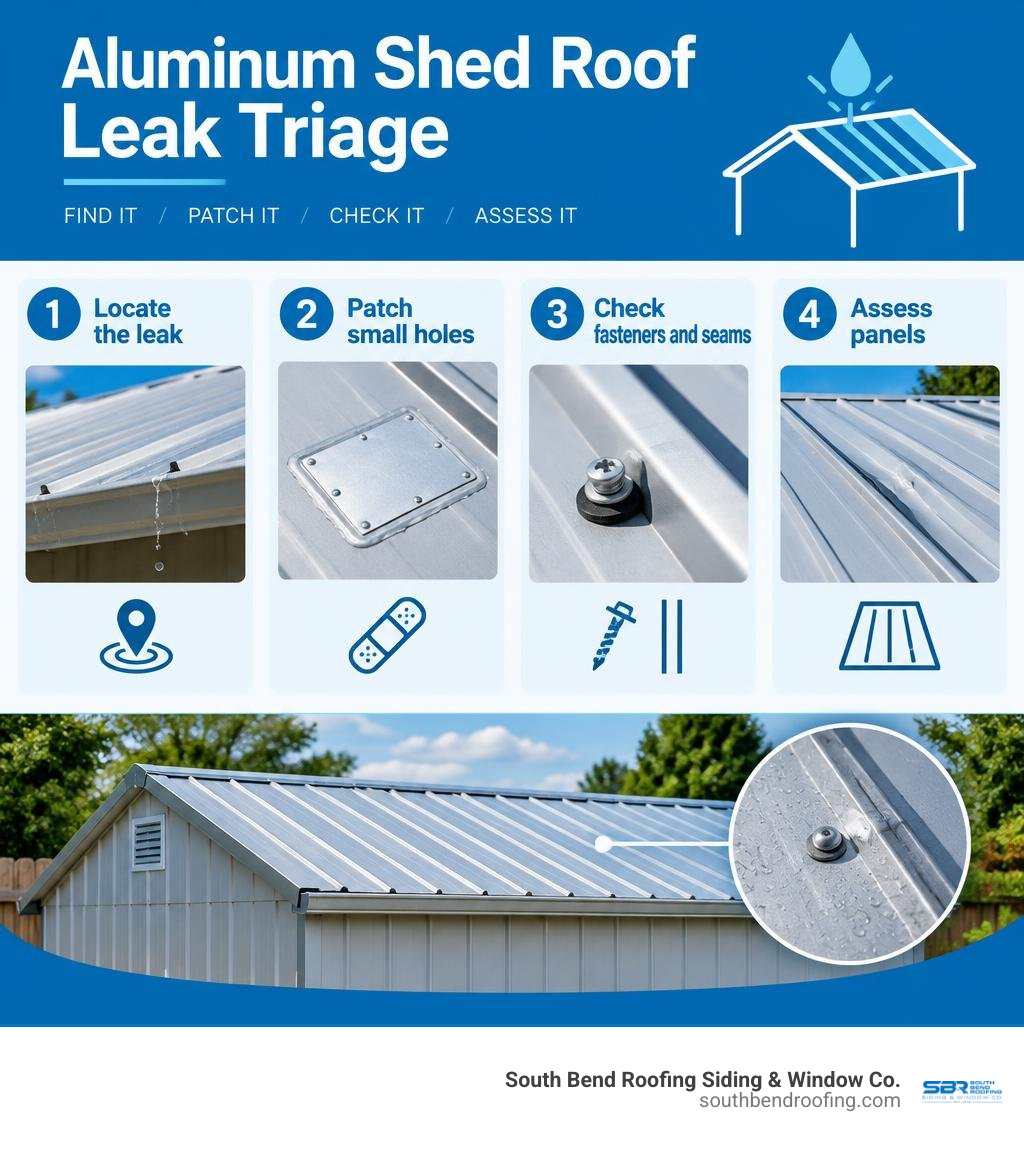
For aluminum shed roof repair, first find where water enters. Clean and dry the damaged area, then cover a small hole with an aluminum patch set over metal-roof-compatible butyl tape. Secure the patch with rivets and seal its edges and rivet heads. Replace loose screws or worn washers, and reseal failed seams. If a panel is badly bent or damaged in several places, a patch may not be enough.
I'm James Spillman, vice president at South Bend Roofing Siding & Window Co. From our company's roofing experience since 1914, I'll explain how to approach aluminum shed roof repair and when to consider replacing a panel.
Common Causes of Leaks in Aluminum Shed Roofs
Aluminum is widely valued for outbuildings because it is lightweight, naturally rust-resistant, and reflects solar heat effectively. However, outdoor storage structures endure extreme seasonal shifts across the Midwest. Over time, physical stress and weather exposure create pathways for moisture intrusion.
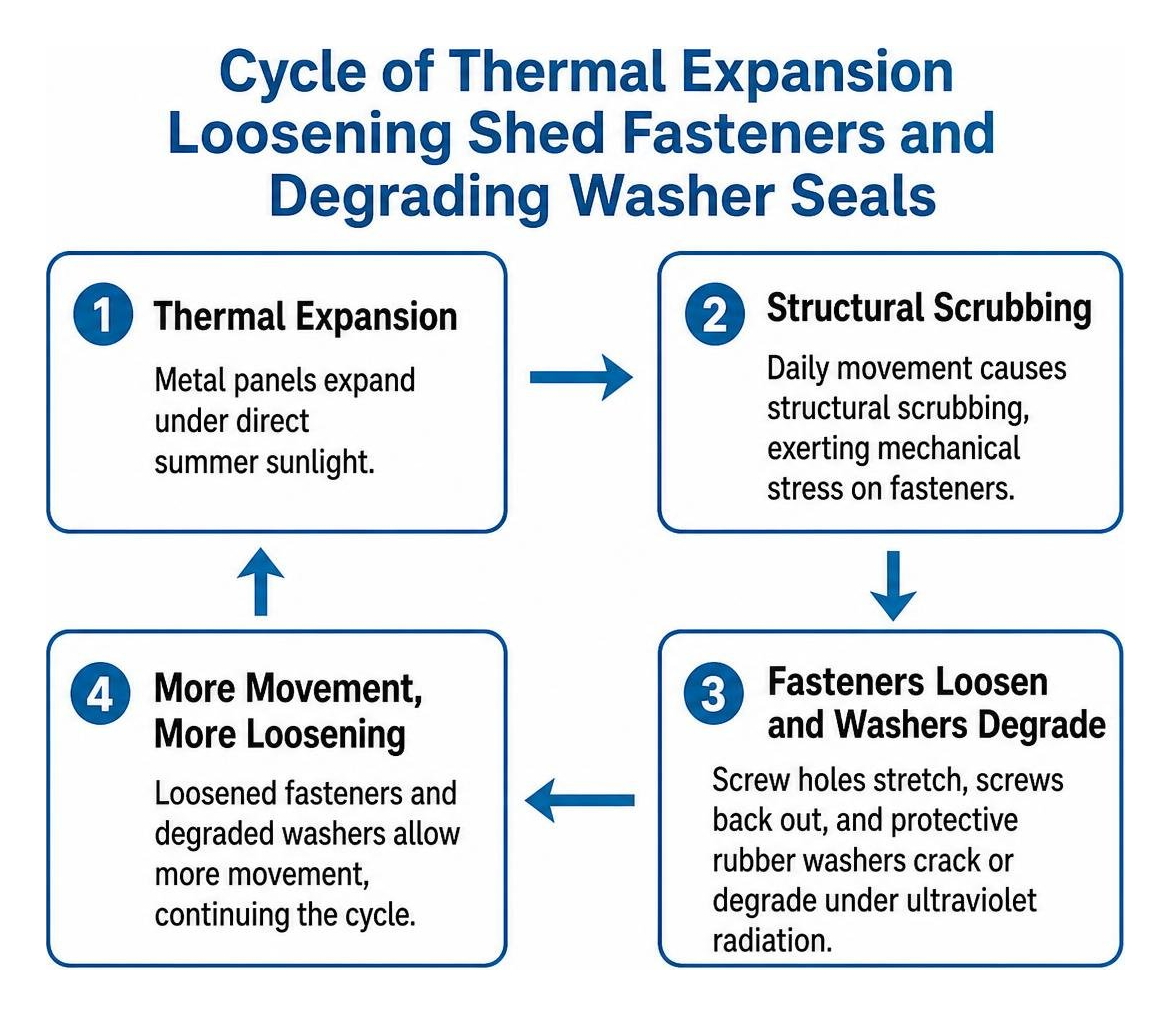
The most frequent culprit behind a leaky aluminum shed roof is thermal expansion and contraction. Metal panels expand under direct summer sunlight and contract rapidly during cold winter nights. This daily movement causes structural scrubbing, which exerts mechanical stress on mechanical fasteners. Over time, screw holes can stretch, screws back out, and protective rubber washers crack or degrade under intense ultraviolet radiation.
Other frequent sources of water intrusion include:
- Failed Lap Seams: Where individual aluminum panels overlap, original factory sealants dry out, shrink, or crack, allowing wind-driven rain to penetrate the joint.
- Physical Impact Punctures: Falling tree branches, heavy hail, or misplaced lawn equipment can tear or pierce thin-gauge aluminum sheets.
- Galvanic Reaction: When steel screws or incompatible metals make direct contact with bare aluminum in the presence of moisture, accelerated localized degradation weakens the metal around fastener heads.
- Capillary Draw: When overlapping panels lose their tight seal, surface tension draws water horizontally between the metal sheets, pulling moisture upward and into the shed interior.
Identifying Leak Sources: True Punctures vs. Condensation
Before grabbing your toolkit, confirm whether the water inside your shed originates from an exterior breach or internal atmospheric moisture. Water travels horizontally along roof trusses, rafters, and framing before dripping to the floor, often masking the true entry point.
To find the exact location of a structural leak:
- The Sunlight Test: Step inside the shed on a bright, sunny afternoon and close the doors completely. Look upward at the underside of the ceiling panels. Any pinpoint puncture, torn seam, or loose screw will reveal itself as a distinct shaft of daylight.
- The Targeted Water Test: If the sun test yields no results, have a partner spray a garden hose gently over isolated sections of the roof starting at the lowest eaves and working upward toward the ridge. Watch the interior framework carefully to pinpoint where moisture first breaches the metal.
That high humidity inside an unheated, enclosed space often mimics an active roof leak. When warm, humid air hits cold metal ceiling panels on chilly mornings, water droplets form across the metal surface and drip onto your tools and floor. If you notice a widespread layer of fine moisture across the ceiling panels rather than an isolated stream of water, your issue is internal condensation rather than an exterior hole.
Essential Tools and Materials for Aluminum Shed Roof Repair
Completing a reliable, lasting repair requires materials engineered to withstand metal movement. Standard household caulks and temporary fixes will fail prematurely when exposed to seasonal temperature shifts.
| Material / Tool | Purpose | Performance Notes |
|---|---|---|
| Roll-Stock Aluminum Sheet | Patching punctures and gashes | Match gauge closely; easily cut with snips |
| Aviation Snips | Cutting metal patches | Use offset snips to create clean, burr-free edges |
| Butyl Rubber Tape | Water-tight gasket beneath patches and lap seams | Stays flexible for 10+ years under thermal stress |
| Elastomeric Roof Coating | Top-layer weatherproofing and UV protection | Flexible membrane with an expected lifespan of 5–7 years |
| EPDM-Gasketed Screws / Pop Rivets | Fastening patches and securing loose sheets | Neoprene or EPDM washers seal against water entry |
| Wire Brush & Sandpaper | Mechanical surface preparation | Removes oxidation and exposes bright metal |
| Isopropyl Alcohol / Degreaser | Chemical cleaning agent | Leaves zero residue for maximum sealant adhesion |
| Standard Silicone Sealant | Not Recommended for Metal Roofs | Tends to lose adhesion after roughly 2 years due to low shear strength |
When working around any outbuilding roof, always prioritize personal safety. Set your extension ladder on firm, level ground, securing the top rails against solid framing rather than fragile aluminum panels. Wear heavy leather work gloves to prevent lacerations from sharp metal edges, and always use safety glasses during drilling and wire-brushing.
Step-by-Step Guide: How to Patch Small Punctures and Seams
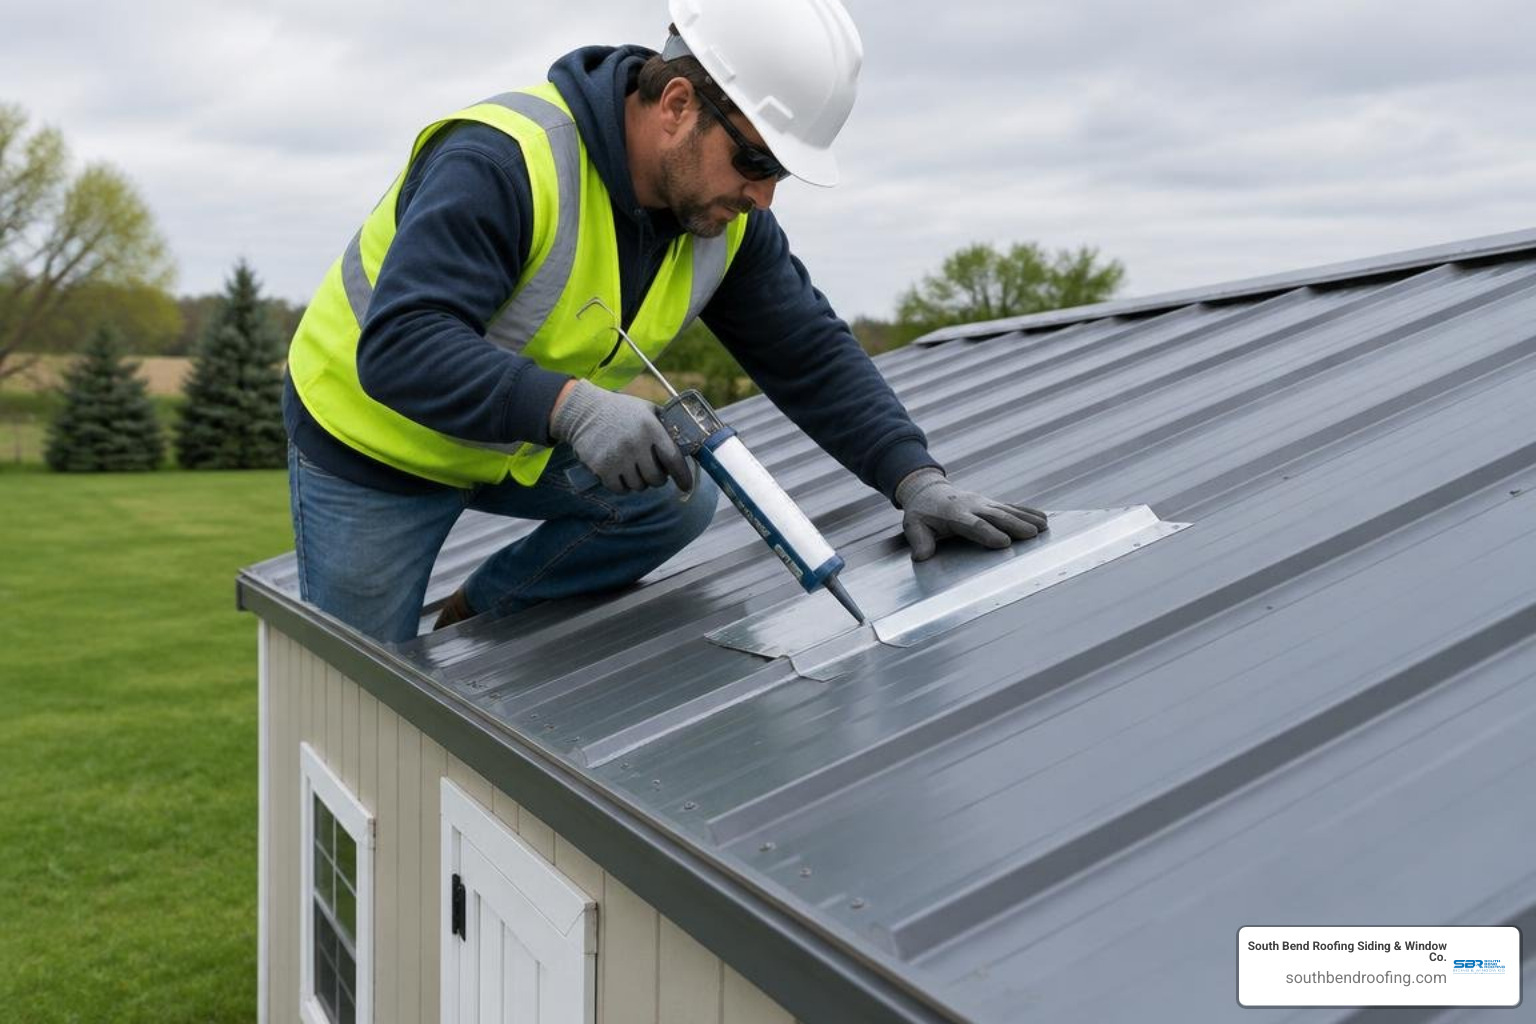
Patching a small hole or tear preserves the integrity of your storage building without the expense of an immediate full overhaul. Follow these detailed steps to achieve a watertight mechanical seal.
Preparing the Surface for Aluminum Shed Roof Repair
Sealants and adhesives cannot bond to chalky oxidation, dirt, or loose paint. Thorough surface preparation is essential for a permanent repair.
- Flatten Deformed Metal: If a fallen branch or tool created a jagged puncture, use a smooth-faced mallet and a wood backing block to gently tap the protruding edges back into plane.
- Scour to Bright Metal: Use a stiff wire brush and medium-grit sandpaper to clean the area extending at least three inches in every direction around the damage. Remove all oxidation, loose paint, and old sealant residue until the aluminum surface shows a clean, bright metal finish.
- Degrease the Substrate: Wipe the entire prepared area thoroughly using a clean cloth saturated with isopropyl alcohol or an industrial degreaser. Allow the metal to dry completely before applying sealants or adhesives.
- Treat Corrosion: While aluminum does not create red rust like steel, it can develop white chalky corrosion. Apply a quality metal primer over exposed, abraded areas to prevent localized deterioration over time. For technical standards on maintaining metal surfaces, consult the NIST Roof Maintenance Manual guidelines.
Applying Metal Patches, Sealants, and Fasteners in Aluminum Shed Roof Repair
Once the surface is clean, smooth, and dry, construct a reinforced patch that flexes with changing temperatures.
- Cut and Shape the Patch: Cut a section of aluminum sheet using aviation snips so that it extends at least 1.5 to 2 inches beyond all edges of the hole. Round off the corners of the patch; square corners tend to snag debris, snow, and wind-driven water, which can peel the patch back over time.
- Apply Butyl Gasket Tape: Lay continuous strips of double-sided butyl rubber tape directly over the cleaned roof panel around the perimeter of the hole. Do not leave gaps in the tape perimeter.
- Set and Fasten the Patch: Press the aluminum patch firmly down over the butyl tape. Secure the patch using blind pop rivets or oversized, corrosion-resistant self-tapping screws fitted with EPDM washers. Space the fasteners roughly 1.5 inches apart around the patch perimeter. Ensure fasteners seat firmly without overtightening, which can crush or distort the rubber washer.
- Encapsulate the Edges: Using a caulking gun, apply a generous bead of high-grade elastomeric sealant or polyether roofing sealant over the entire edge of the patch. Feather the sealant outward with a putty knife so water flows smoothly over the repair rather than pooling against the metal lip.
- Secure Failing Fasteners and Seams: If the leak originated at a loose panel screw, back the old screw out completely. Replace it with an oversized metal roofing screw equipped with a fresh EPDM gasket. For loose overlapping seams, lift the seam slightly, slide butyl tape between the panels, clamp them together, and drive new fasteners through the overlap.
If you find that multiple panels have failed across a larger structure or home addition, exploring professional residential roofing services can help you decide on long-term repair strategies.
Repair vs. Replacement: When to Call a Professional
Minor punctures, loose screws, and isolated seam separations are well suited for DIY repairs. However, extensive physical or structural wear may indicate that an aluminum roof has reached the end of its serviceable lifespan.
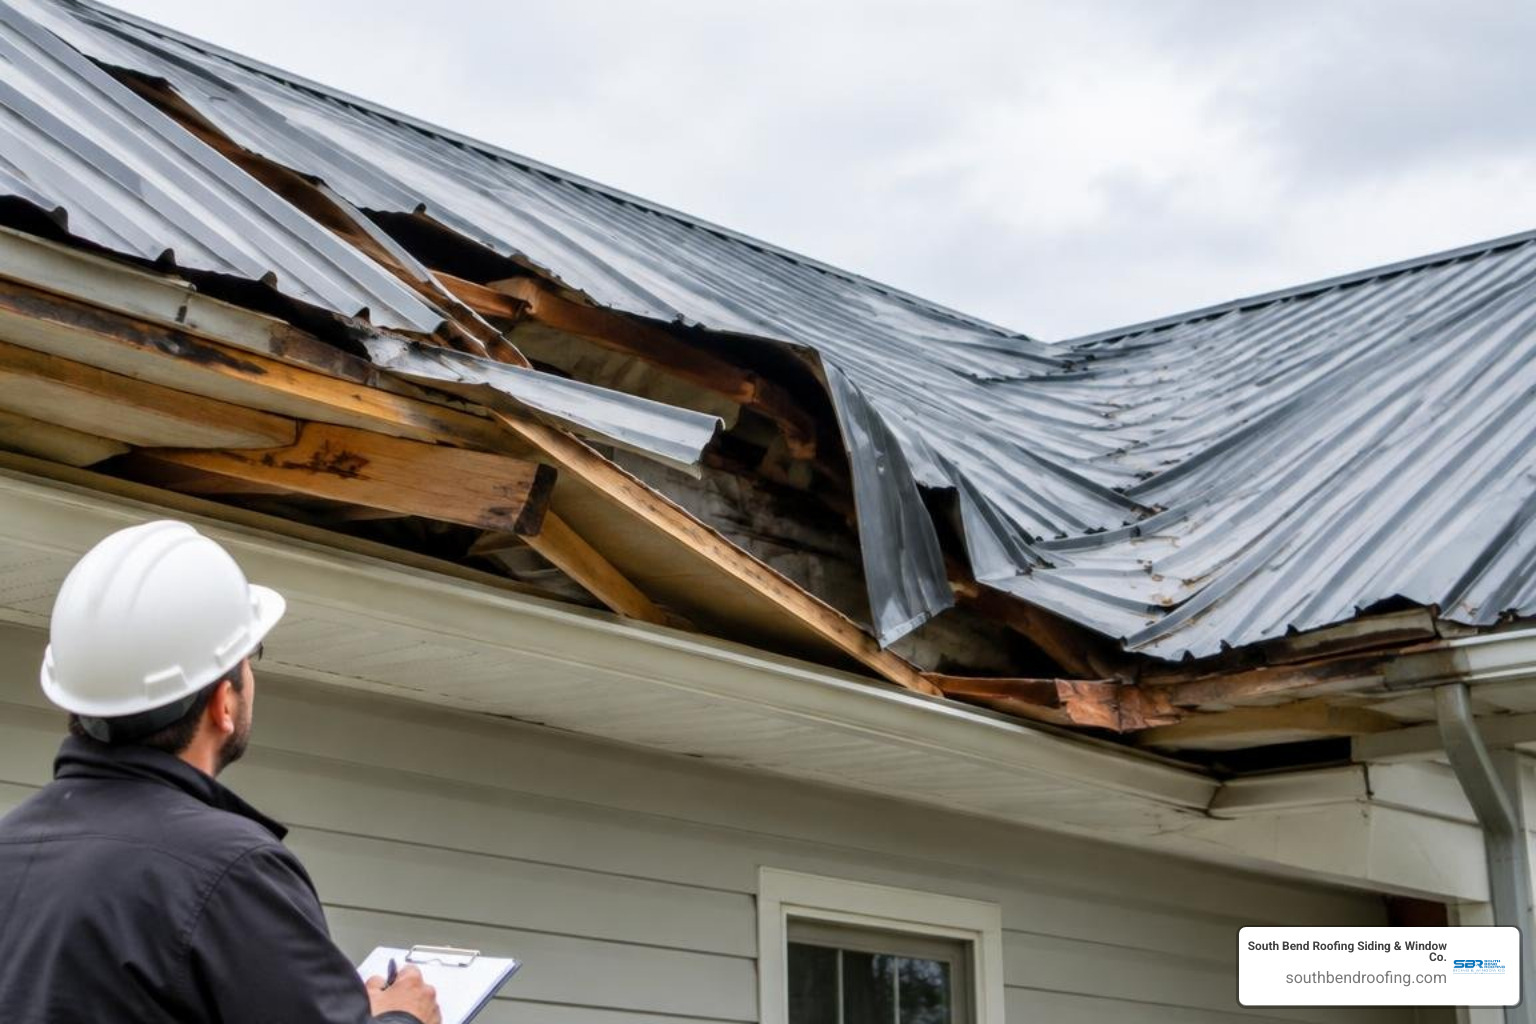
Consider a broader structural repair or complete panel replacement if you encounter:
- Widespread Metal Fatigue: If panels show multiple stress cracks or deep tears across numerous sections, individual patches will only provide temporary relief.
- Structural Sagging: If the underlying roof framing, purlins, or trusses have rotted or deflected due to sustained moisture exposure, the roof decking must be uncovered, inspected, and rebuilt.
- Extensive Fastener Back-Out: When enlarged screw holes appear throughout the roof, panels can become loose during high-wind events.
For outbuildings or larger additions showing severe wear, a professional assessment can help determine whether repair or panel replacement is appropriate. When an old system has deteriorated beyond simple maintenance, complete re-roofing or full roof replacement and tear offs ensure the underlying structure remains protected against the elements. If a sudden severe storm causes urgent damage, reaching out for 24 hour roof repair near me will help stabilize your building before water damages stored tools, equipment, or building interiors.
Frequently Asked Questions About Aluminum Shed Roofs
What is the best sealant for an aluminum shed roof?
Butyl rubber tape paired with a high-solids elastomeric roof coating is the most dependable sealing combination for aluminum roofing. Unlike standard silicone caulks—which often pull away from smooth metal surfaces within a couple of seasons—butyl compounds and elastomeric sealants remain pliable through severe freeze-thaw cycles and ongoing thermal movement.
Can I walk directly on an aluminum shed roof during repairs?
No, you should never walk directly on thin-gauge aluminum shed panels. Aluminum sheets used on storage sheds are lightweight and will easily bend, crease, or pop loose from their fasteners under foot traffic. Always perform repairs from a stable ladder positioned beside the shed, or place a sturdy wooden crawl board across the main roof framing members to distribute your body weight evenly across load-bearing points.
Why is my shed roof dripping when it has not rained?
Dripping inside a shed during dry weather is almost always caused by interior condensation. When warm, humid air gets trapped inside an unventilated shed, it condenses against the cool underside of the aluminum ceiling panels on cold mornings, forming droplets that fall like a leak. Installing gable vents, ridge vents, or soffit vents promotes continuous airflow and equalizes internal and external temperatures, eliminating moisture buildup.
Conclusion
Carrying out an effective aluminum shed roof repair protects your valuable tools, gardening equipment, and stored items from water damage. By locating the true source of moisture, cleaning the metal down to a bright finish, and applying flexible butyl sealants alongside mechanical patches, you can resolve leaks without replacing entire panels. Conducting routine inspections in the spring and fall ensures your outbuilding remains fully weather-resistant throughout the year.
When you need dependable, long-term exterior solutions for your home or property, our team at South Bend Roofing brings over 110 years of trusted local craftsmanship to every project. Whether you need standing seam metal roofing, asphalt shingle replacements, or comprehensive commercial flat roof maintenance, our experienced professionals back our installations with manufacturer warranty coverage and our own dedicated Workmanship Warranty. Contact South Bend Roofing Siding & Window Co. today at (574) 288-4764 to schedule your free roof inspection and detailed written estimate.