PVC Roofing Installation Starts With a Sound Deck and Sealed Seams
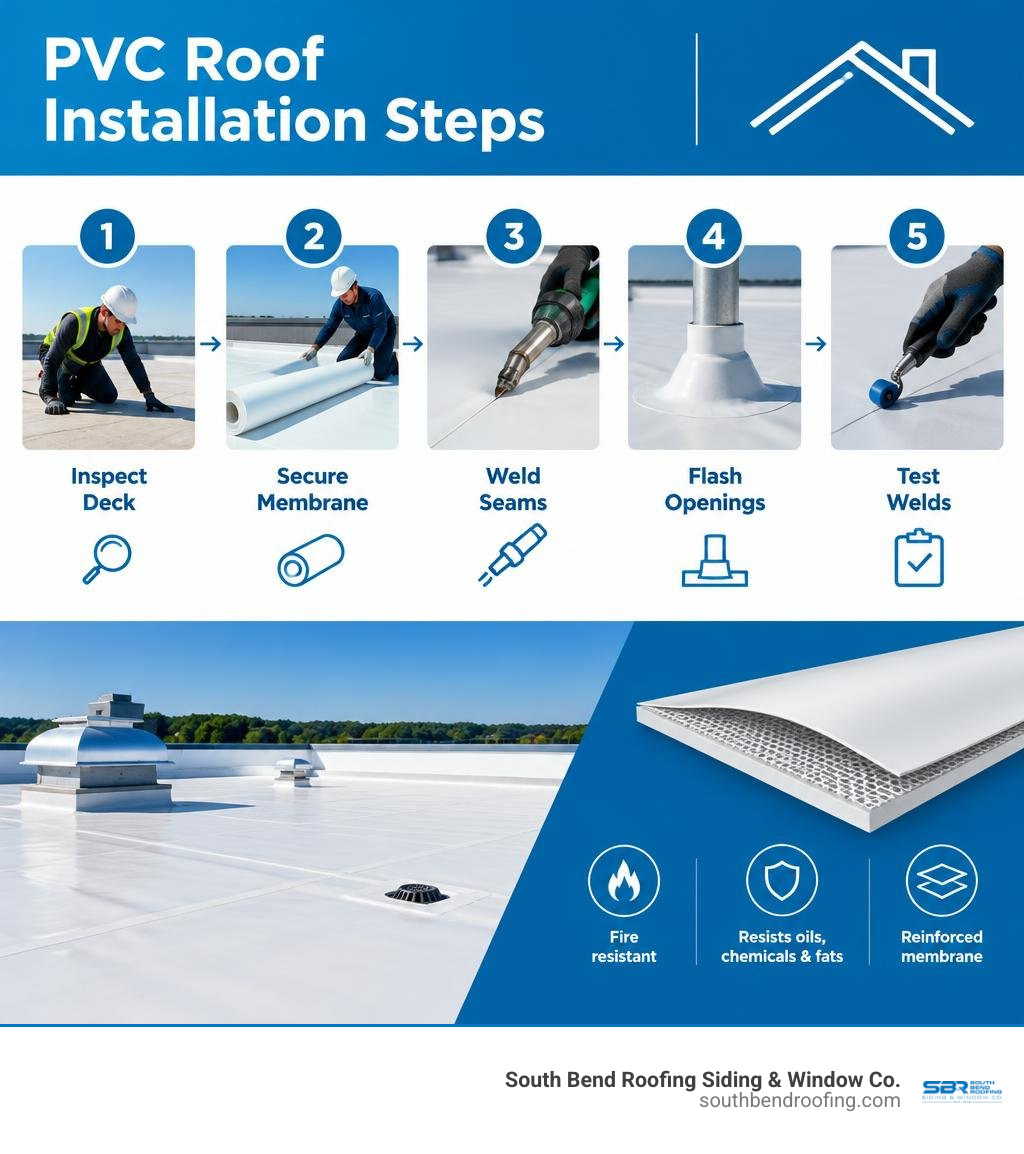
For a sound PVC roofing installation, inspect and clean the roof deck, then lay out the membrane and secure it with the attachment method specified for the building. Hot-air weld the seams, flash drains, pipes, and roof edges, and test every weld before calling the roof complete.
These steps matter most where rooftop exhaust may expose the roof to grease and chemicals. PVC membrane offers resistance to those exposures, but a missed seam or poorly sealed penetration can still let water in.
I’m James Spillman, Vice President at South Bend Roofing Siding & Window Co., where our team draws on more than 110 years of roofing experience dating back to 1914. My work with commercial membrane roofing informs this guide to PVC roofing installation, from deck checks through final weld testing.
Core PVC Roofing Installation Methods: Mechanically Fastened, Adhered, and Induction Welded
Selecting the right attachment method dictates how the roof handles high-wind uplift, building movement, and thermal expansion. Polyvinyl chloride (PVC) single-ply membranes comply with ASTM D4434 standards and feature a reinforced polyester or fiberglass scrim sandwiched between two layers of flexible ethylene-chlorine polymer. This chemistry gives PVC natural fire resistance and high resistance to animal fats, oils, jet fuels, and industrial acids.
For facilities in Indiana and Michigan that produce harsh rooftop exhausts, our commercial roofing services focus on matching the exact attachment engineering to structural parameters and environmental exposures. Understanding the distinctions outlined in technical PVC Roofing Systems documentation ensures that your building remains watertight for decades.
| Feature | Mechanically Attached | Fully Adhered | Induction Welded |
|---|---|---|---|
| Primary Fastening Mechanism | Heavy-duty screws with barbed stress plates in membrane laps | Liquid adhesive (solvent, water-based, or urethane) across the substrate | Electromagnetic bonding to PVC-coated metal stress plates |
| Best Application | New construction on steel or wood decks; fast large-scale field coverage | High-wind coastal zones, irregular decks, concrete substrates, re-roofs | Metal deck retrofits, wide-sheet assemblies without membrane puncture |
| Installation Speed | Rapid installation; independent of low temperatures | Moderate to slow; highly temperature and open-time dependent | Fast field production; requires calibrated induction tools |
| Wind Flutter Potential | Moderate sheet billow under severe negative pressure | Zero flutter; continuous structural bond across field | Minimal flutter; grid-fastened plate matrix limits billow |
| Deck Penetrations | Fasteners placed in seam overlaps | Fasteners secure substrate board only; none in sheet laps | Fasteners secure substrate board only; none penetrate membrane |
Mechanically Attached PVC Systems
Mechanically attached systems are common across Midwestern warehouses and industrial centers with steel decking. The membrane rolls out across the substrate, and technicians drive heavy-duty fasteners through barbed steel stress plates placed directly in the side-lap seams of each sheet.
To withstand wind uplift forces, perimeter fastener rows must be spaced closer together than field rows. Spacing between fastener rows along building perimeters should be no greater than 60% of the width of the field sheets. When consecutive wind gusts create negative pressure, mechanical systems experience slight sheet billow or flutter. Barbed plates pinch the reinforced scrim without slicing the polymer, holding the roof secure in high winds.
Fully Adhered PVC Systems
Fully adhered systems provide a flat, smooth roof profile with zero membrane billow. Adhesion is ideal for facilities with positive internal building pressures, concrete roof decks, or areas where wind uplift concerns demand continuous bonding.
Adhesive coverage rates and curing dynamics vary significantly depending on the chemistry used:
- Low-VOC Solvent-Based Adhesive: Requires a two-sided application where adhesive is applied to both the substrate and the underside of the sheet. The typical coverage rate ranges from 50 to 90 ft²/gal (2.0 to 1.11 gal/sq). Sheets are mated once the adhesive becomes tacky without transferring to a dry fingertip.
- Water-Based Adhesive: Applied primarily to dry substrates in warmer weather, delivering coverage rates between 120 and 180 ft²/gal (0.83 to 0.56 gal/sq). The membrane is rolled directly into wet adhesive, requiring an open substrate that permits moisture evaporation.
- Urethane Foam Adhesive (Fleece-Backed Membranes): Applied in extruded ribbons. For high-wind corners and perimeters, 4" on-center bead spacing yields a coverage of roughly 67 ft²/gal (1.49 gal/100 ft²). In field areas, 12" on-center ribbon spacing yields approximately 200 ft²/gal (0.5 gal/100 ft²). Once rolled into the rising foam, the non-woven polyester backing locks into the adhesive matrix.
Induction Welded PVC Systems
Induction welding combines the non-penetrating advantages of fully adhered systems with the speed of mechanical fastening. Substrate boards are fastened to the roof deck using specialized PVC-coated metal plates arranged in a precise grid pattern. Technicians lay standard, non-fleece PVC membrane sheets across the roof without driving screws through the waterproofing layer.
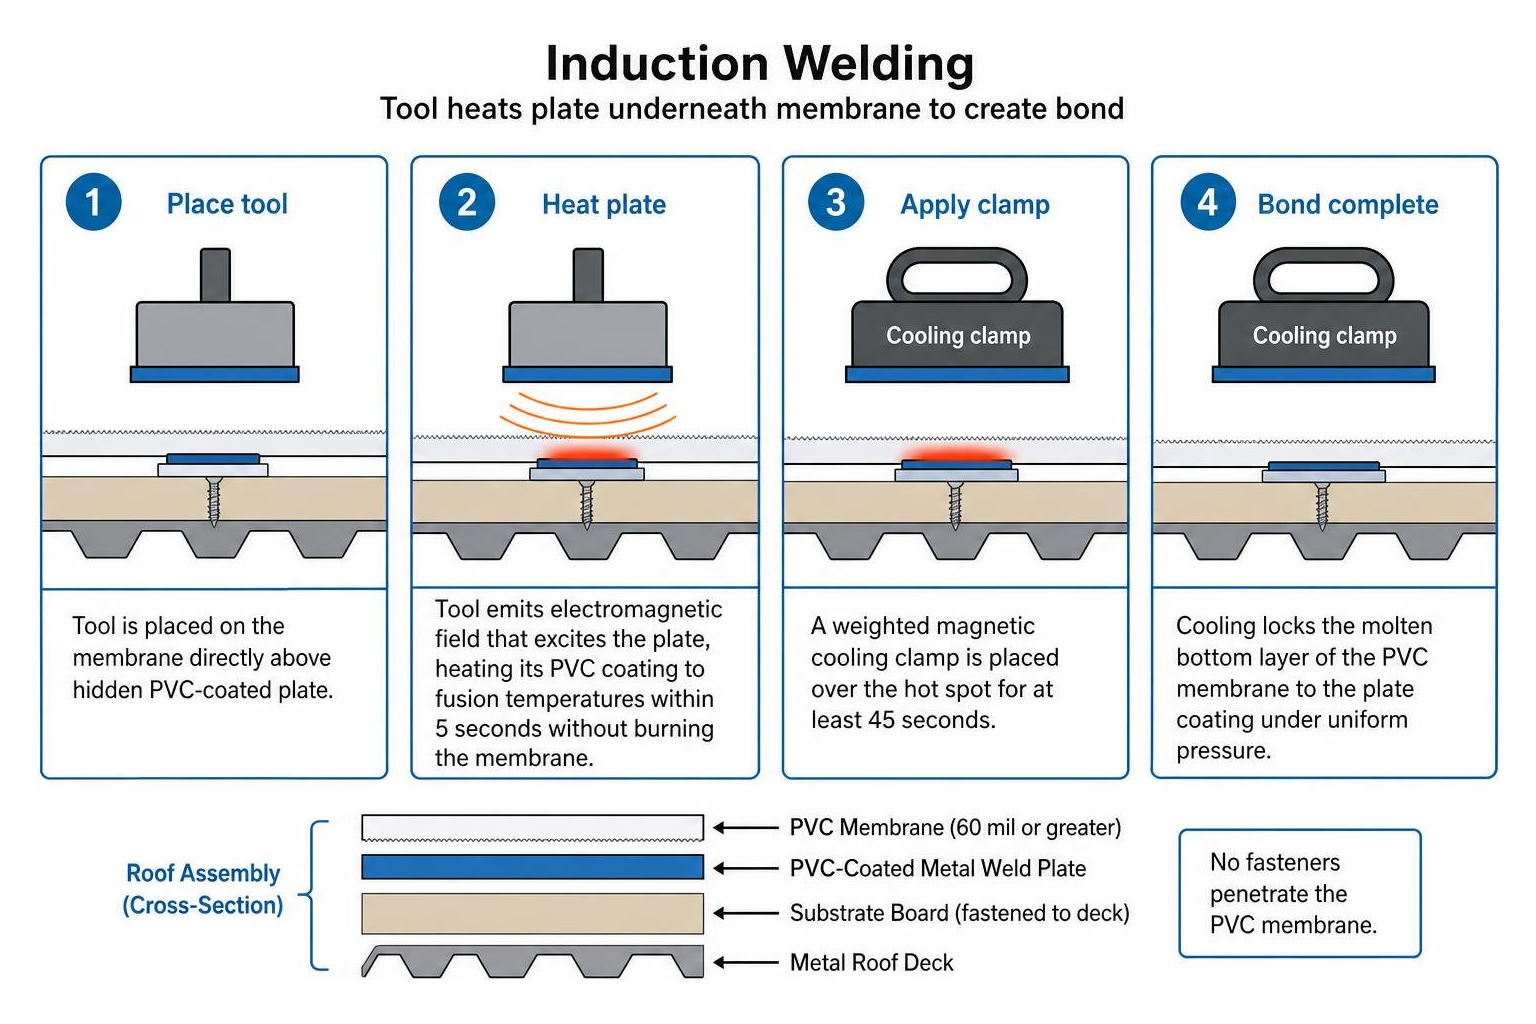
An induction welding tool is placed on top of the membrane directly above each hidden coated plate. The tool emits a focused electromagnetic field that excites the metal plate underneath, heating its proprietary PVC coating to fusion temperatures within 5 seconds without burning the membrane above.
Technicians instantly place a weighted magnetic cooling clamp over the hot spot for at least 45 seconds. This cooling cycle locks the molten bottom layer of the PVC membrane to the plate coating under uniform pressure.
Induction weld plates are rated for PVC membranes that are 60 mil thick or greater. For building corners subject to severe vortex uplift, the fastener rate (contributory area) must be condensed so it is no greater than 40% of the field fastener rate, while perimeter zones must not exceed 60% of the field rate. This method is effective for commercial re-roofing and retrofit projects over standing seam metal decks.
Substrate and Deck Preparation Before PVC Membrane Placement
A single-ply membrane is only as reliable as the substrate beneath it. Before rolling out single-ply rolls, the roof deck must be cleared of dust, dirt, moisture, grease, and sharp fasteners.
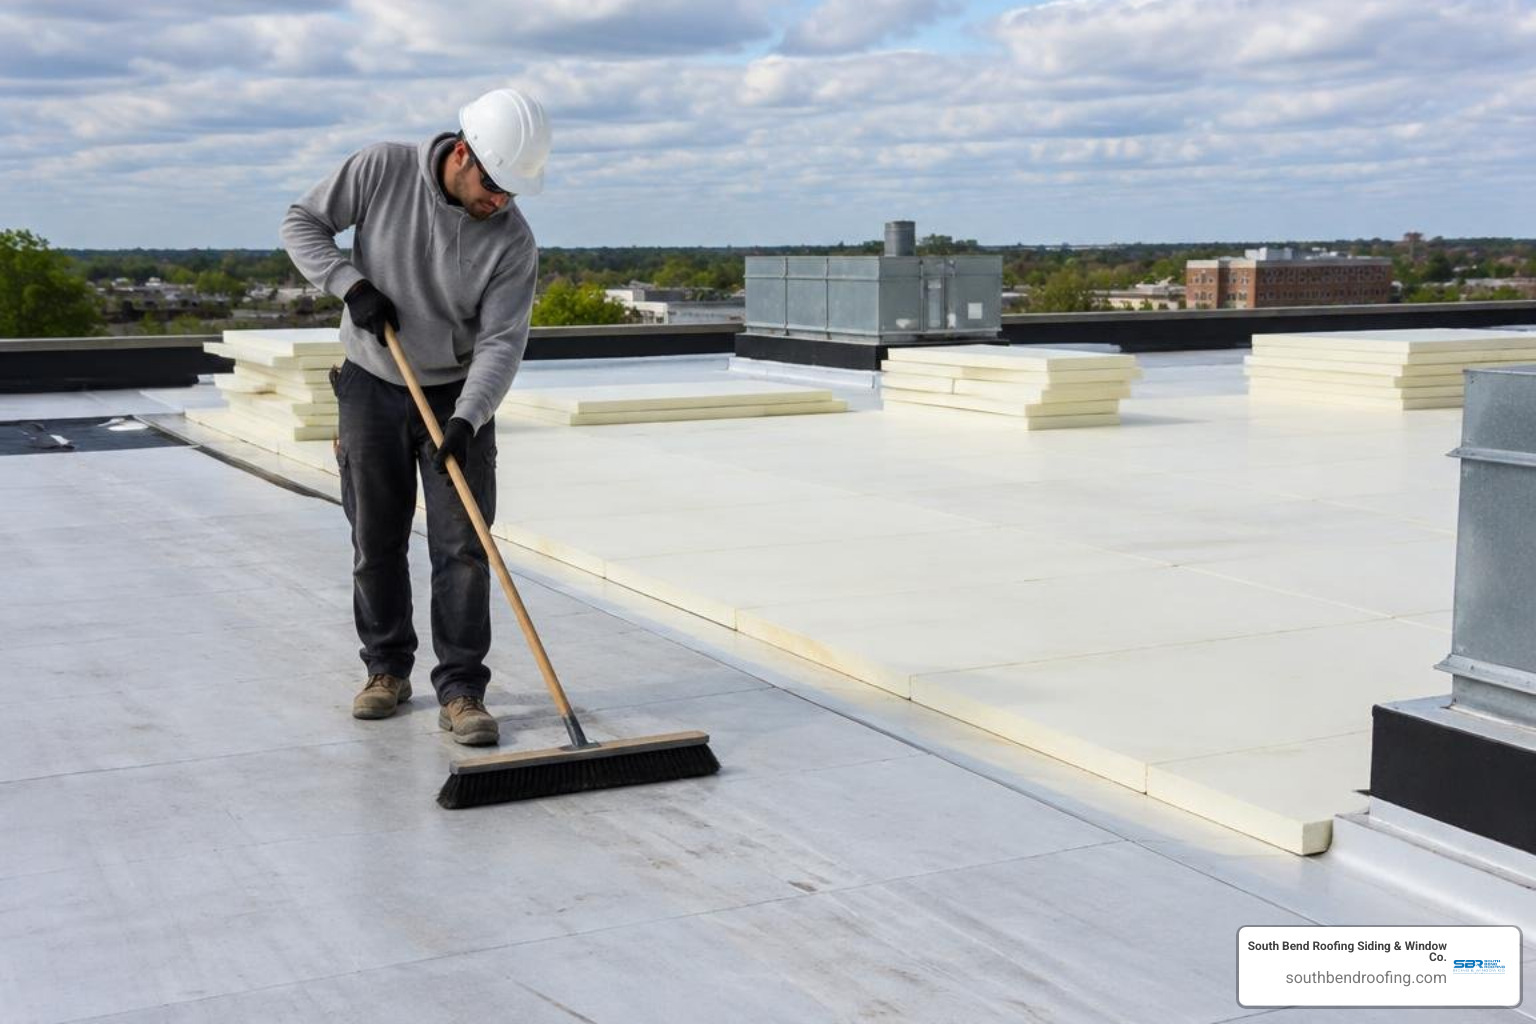
Building codes require a minimum design slope of 1/4" per foot (2%) for positive drainage. Standing or ponding water that remains for longer than 48 hours accelerates dirt accumulation and adds dead load to the building structure. When decks exhibit severe deflection, structural deterioration, or moisture saturation, complete roof replacement and tear-offs allow our crew to strip old materials down to the structural deck, inspect the decking, and complete all needed substrate repairs.
Inspecting Roof Decks and Wood Nailers
Different decking materials present distinct preparation needs:
- Fluted Steel Decks: Must be minimum 22-gauge structural steel. Corrosion must be treated or replaced, and substrate or cover boards must span flutes safely without sagging.
- Poured Concrete and Precast Planks: Must be fully cured, dry, and free of deep voids, ridges, or release agents that compromise adhesive bonding.
- Treated Wood Nailers: Must be installed at all roof perimeters, gravel stops, expansion joints, and penetration curbs. Wood nailers must match the height of the adjacent substrate board to ensure a smooth, flush transition. Fasteners for wood nailers must be spaced no greater than 24" on-center, with at least three fasteners per nailer board. Each fastener must resist a minimum pull-out force of 200 lb/ft (298 kg/m) in any direction.
Substrate Attachment and Vapor Retarders
Substrate boards must be laid with tightly butted joints. Any gaps wider than 1/4" between substrate or cover boards must be filled with matching material to prevent heat loss, membrane sagging, and cold-air thermal convection beneath the sheet.
Single-layer board layouts can lose up to 8% of their thermal efficiency through unsealed board joints and exposed metal fasteners. Installing multiple layers of staggered cover boards offsets vertical seams, eliminating direct thermal bridging. Air and vapor retarders must be installed over the structural deck on high-humidity facilities—such as commercial laundries, indoor pools, or food processing plants—or whenever external wall openings exceed 10% of total wall area, preventing warm, moisture-laden indoor air from condensing under the cool single-ply sheet. Proper substrate installation complies with established PVC single-ply membrane performance standards.
Step-by-Step Seam Welding, T-Joints, and Quality Testing
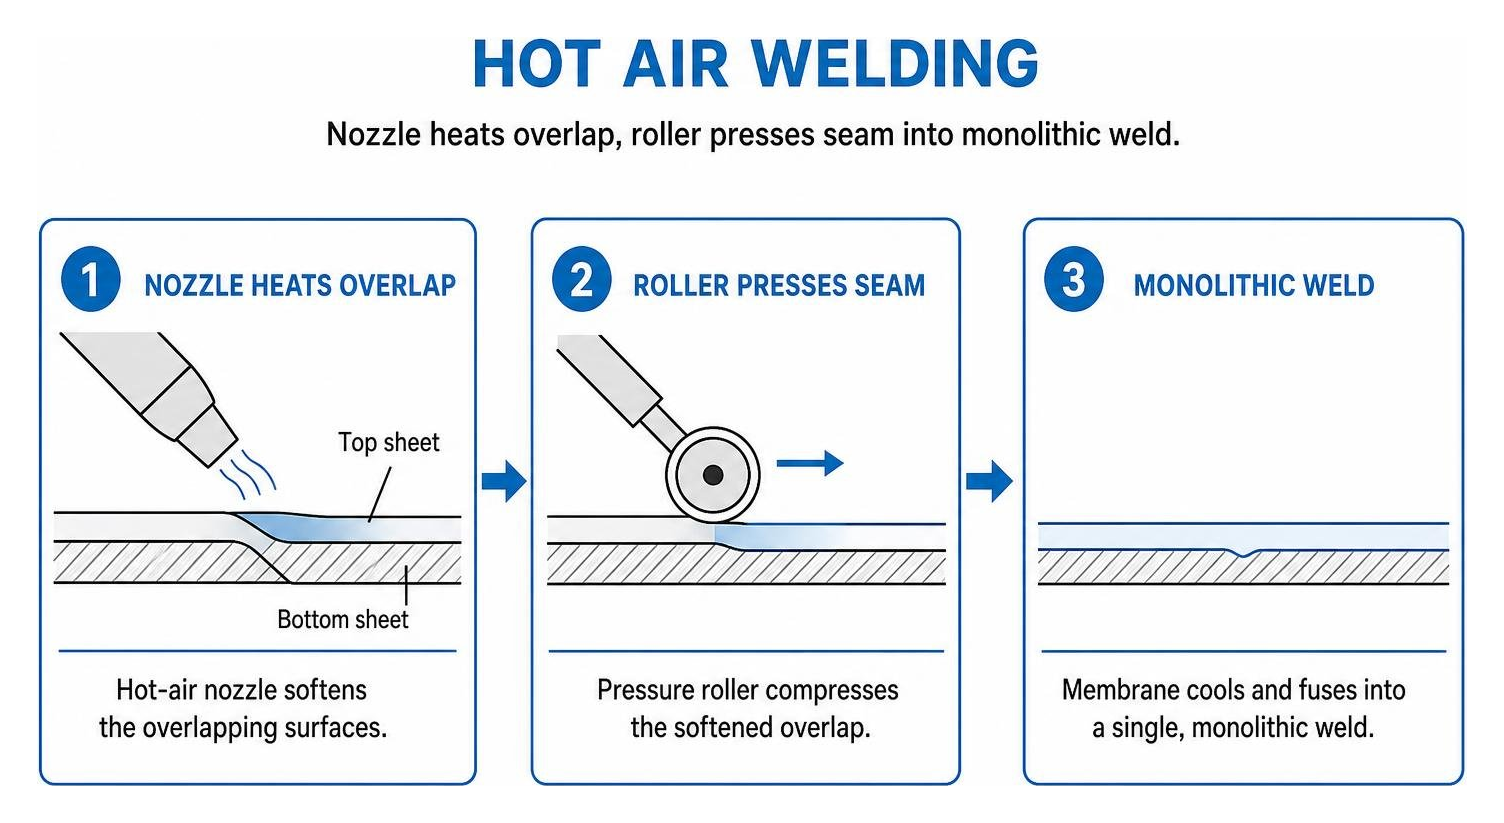
Hot-air welding melts the overlapping thermoplastic surfaces, fusing them into a single sheet that is stronger than the membrane itself.
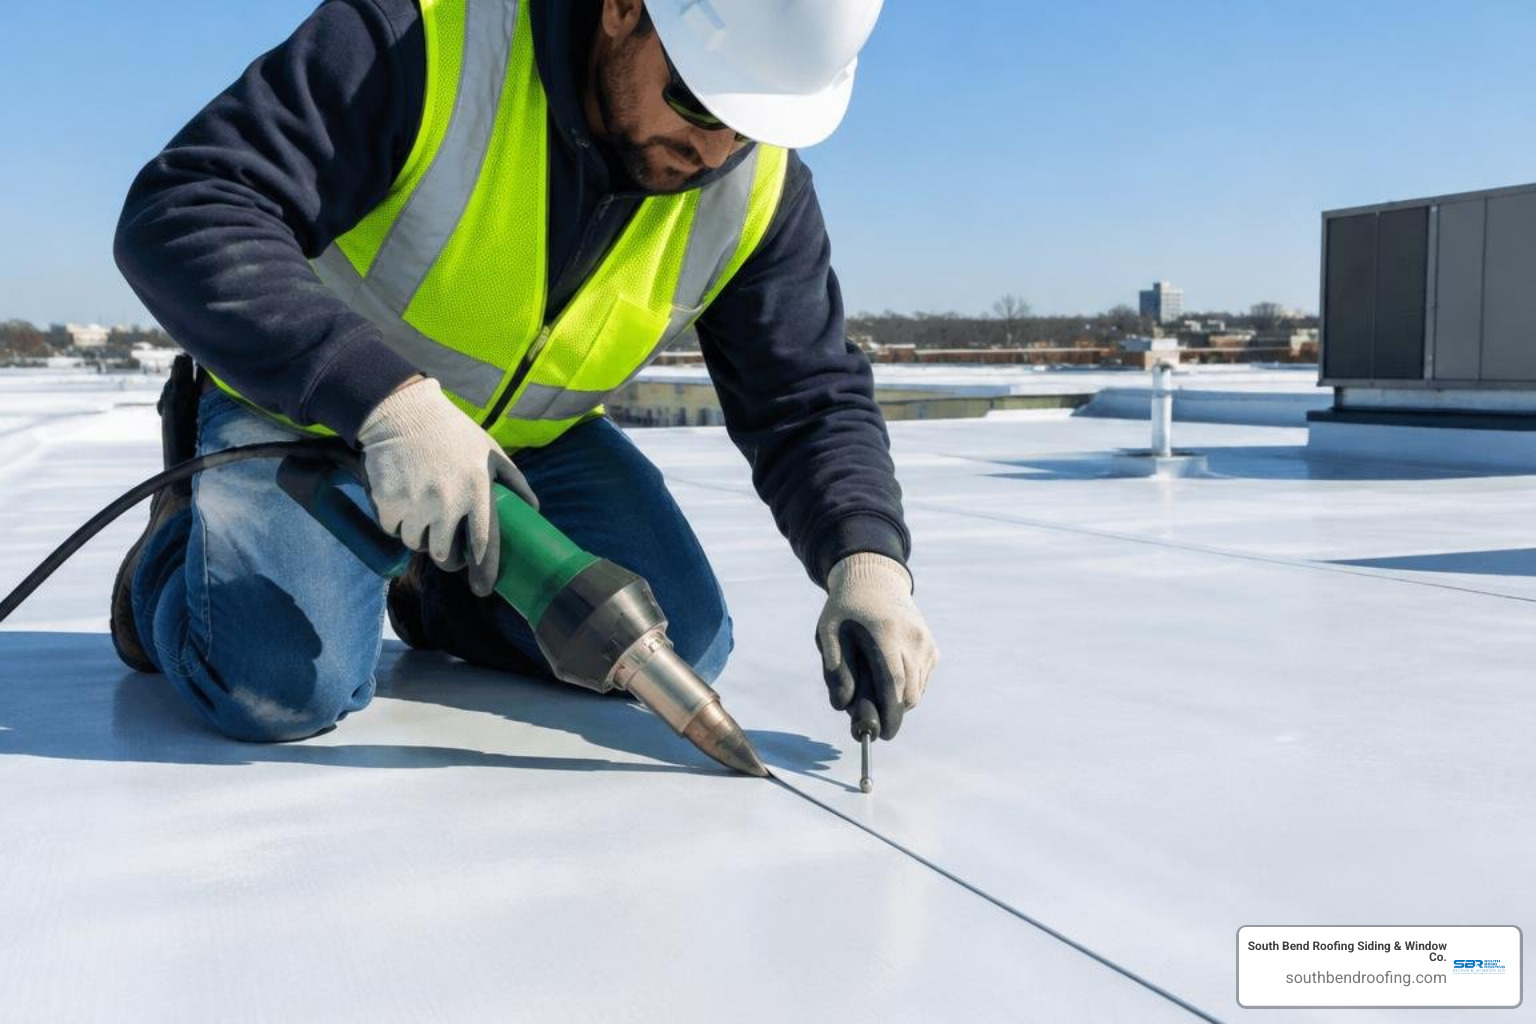
Before making any welds, unroll the PVC sheets and allow them to relax flat on the roof for 15 to 30 minutes (allow at least 30 minutes in temperatures below 60°F). This step relieves factory roll tension and prevents wrinkles from forming during welding.
Hot-Air Welding Best Practices for PVC Roofing Installation
Automated hot-air welding machines (robotic crawlers) maintain consistent heat, speed, and roller pressure along straight, open field seams:
- Power Delivery: Run automatic welders using dedicated 10,000 to 12,000-watt generators to avoid voltage drops that cause inconsistent welding heat.
- Welding Temperatures: Set hot-air nozzle outputs to roughly 1,094°F to 1,100°F, balancing travel speed against ambient air temperature and wind chill.
- Seam Overlap and Width: Maintain a minimum 3" sheet overlap for mechanical fasteners and a minimum 1½" (3.81 cm) wide continuous hot-air welded bond on all field and detail seams.
- Daily Test Welds: At the start of each morning and afternoon shift, run a 4-to-5-foot test weld using scrap membrane. Allow the sample to cool for 10 minutes, then perform a manual peel test. A successful weld exhibits cohesive failure—the weld holds firm while the polyester reinforcing scrim tears apart within the membrane itself.
T-Joint Detailing and Daily Weld Probe Testing
A T-joint occurs wherever three layers of membrane intersect: the end lap of one roll crossing over the continuous side lap of two underlying rolls. The thickness step-off at this junction creates a microscopic capillary channel if not properly addressed.
- Edge Chamfering: Use a hand-held silicone roller and the heated edge of a hot-air nozzle to chamfer or shave the edge of the middle sheet at a 45-degree bevel before welding the top flap down.
- T-Joint Patch Application: Install a prefabricated circular PVC T-joint patch centered directly over the intersection. Hand-weld the patch working from the center outward to eliminate air pockets.
Every linear foot of seam must be inspected at the end of each working day.
- Allow welded seams to cool completely (at least 15 minutes).
- Slide a dull, rounded cotter-pin seam probe firmly along the entire seam edge, applying moderate outward pressure against the lap.
- If the probe tip penetrates the seam or catches on an unbonded void (cold weld), immediately mark the area for repair.
- Clean the unbonded area, heat with a hand-welding nozzle, press with a silicone roller, and install an overlapping round PVC patch extending a minimum of 2" past all sides of the void.
If weather damage, puncture tears, or open seams compromise a building envelope unexpectedly, dispatching our 24 hour roof repair near me crew protects critical interior assets and restores monolithic seam continuity.
Flashing Details for Parapets, Drains, and Roof Penetrations
Rooftop penetrations and vertical transitions require precise flashing details. Over 90% of commercial roof leaks originate at flashings, drains, or curbs rather than the open field membrane.
Critical Penetration Flashing in PVC Roofing Installation
Kitchen exhaust fans, grease traps, vents, and HVAC units require chemical-resistant flashing assemblies that direct drainage away from the penetration base:
- Round Pipes and Conduits: Install prefabricated PVC pipe boots wherever possible. Cut the boot sleeve to a snug friction-fit around the pipe, slide it down over the curb, hot-air weld the 4" wide base flange to the field membrane, and secure the top with a stainless steel clamping band. Fill the upper rim with an approved polyurethane sealant.
- Roof Drains: Recess drain sumps to sit lower than the surrounding field. Apply a heavy bead of water-cutoff mastic around the cast-iron drain bowl lip, roll the field membrane into the sump over the mastic, cut out the drain opening, and bolt the clamping ring down firmly. The clamping ring exerts mechanical compression on the mastic seal, preventing backup water from slipping under the roof.
- Chemical Exposure Containment: Around kitchen grease extractors or chemical venting hoods, weld an elevated containment curb flashed with 80-mil PVC membrane to prevent hot animal fats or industrial chemicals from pooling directly over field seams.
Parapet Wall Termination and Perimeter Edge Securement
Parapet walls must be flashed vertically using reinforced PVC wall sheets:
- Flashing Height: Extend vertical flashings a minimum of 8" (20.32 cm) above the finished roof level.
- Wall Securement Density: Fasten mechanically attached flashings to the parapet wall at a maximum vertical distance of 18" on-center, and horizontally along the base at a maximum spacing of 12" on-center.
- Termination Bar Application: Seal the top edge of the flashing membrane using a continuous 1" aluminum termination bar with a bead of water-cutoff mastic applied directly behind the sheet. Drive fasteners through the termination bar at 6" intervals, and secure an exterior metal counterflashing hood over the assembly.
- Edge Metal Drip Edges: Along eaves or non-parapet perimeters, install PVC-coated metal drip edge profiles. Fasten the metal flange over the nailer at 4" on-center in a staggered pattern, and hot-air weld a 6" PVC cover strip across the coated metal and field sheet seam.
Cold Weather Protocols and Temperature Precautions
Installing PVC single-ply systems in cold conditions (below 50°F, and especially below 40°F) requires adjusted jobsite protocols to prevent inferior welds and adhesive failures.
- Double Destructive Shear Testing: In temperatures below 50°F, cut and evaluate at least twice the normal number of field seam test strips. Cold ambient air acts as a heat sink, sapping thermal energy from welder nozzles. Technicians must reduce robotic welder travel speed or raise nozzle temperatures to maintain complete 1½" polymer fusion.
- Heated Storage for Adhesives and Sealants: Adhesives, mastics, and chemical primers must be stored in a heated jobsite trailer or hot box maintained between 60°F and 80°F (16°C to 27°C). Solvent adhesives applied below 40°F can develop surface condensation ("blushing") as evaporating solvents chill ambient air to its dew point. If moisture forms on the adhesive surface before mating, adhesion drops significantly.
- Handling Stiff Membranes: PVC rolls become stiff at low temperatures. Unroll sheets and allow extended relaxation times (30 minutes or more) in the sun before securing. Never throw, drop, or sharply crease cold PVC rolls, as impact shocks can fracture chilled polymers.
Frequently Asked Questions About PVC Roofing
How does chemical and grease resistance affect PVC membrane performance?
Unlike rubber or standard polyolefin membranes, the chlorine atoms within the PVC molecular chain make the polymer naturally resistant to animal fats, cooking oils, greases, jet fuels, and industrial solvents. In restaurant environments or manufacturing plants, greasy exhausts cause inferior membranes to swell, soften, delaminate, and fail within a few years. PVC remains chemically stable, preventing premature roof failure around grease traps and rooftop exhausts.
What is the minimum required seam weld width and testing procedure?
All commercial PVC roofing specifications mandate a minimum 1½" (3.81 cm) wide continuous heat-fused seam. Testing requires two steps: daily destructive peel tests (conducted on 4-to-5-foot test strips at the start of each work shift to verify cohesive scrim failure) and 100% non-destructive physical probe testing of every completed seam using a rounded cotter-pin seam probe at the end of each day.
Can a PVC roof system be installed during freezing winter conditions?
Yes. Mechanically attached and induction-welded PVC systems can be installed in freezing winter conditions because they rely on mechanical screws and hot-air fusion rather than temperature-sensitive liquid adhesives. Installers must store rolls, mastics, and plates in heated enclosures, slow down automatic welding speeds to compensate for cold air, and run double the normal quantity of seam sample pull tests to confirm weld strength.
Delivering Proven Protection for Commercial Roofs
Applying commercial PVC membrane roofing demands rigorous deck preparation, proper fastener density, precise temperature calibration, and careful detailing around drains and parapets. When engineered correctly, heat-welded PVC creates a continuous, chemical-resistant roofing barrier that protects facilities from grease exhaust, corrosive airborne fallout, standing water, and heavy storms.
At South Bend Roofing Siding & Window Co., our commercial roofing team brings over 110 years of trusted local craftsmanship to every project. As a certified Duro-Last contractor, we install customized PVC roofing, TPO, and EPDM single-ply assemblies across Indiana and Michigan—including South Bend, Elkhart, Fort Wayne, Indianapolis, Northwest Indiana, and Southwest Michigan. Whether your facility needs full roof replacement, targeted repairs, or proactive preventative maintenance, our team explains your warranty coverage and schedules work around your operating hours to keep business disruptions to a minimum.
To discuss your project or schedule a free roof inspection and written estimate, call South Bend Roofing Siding & Window Co. today at (574) 288-4764 or visit our commercial roofing services page to get started. For general information about our full line of services, you can also return to our homepage.