How to Get Rid of an Ice Dam on a Roof Safely
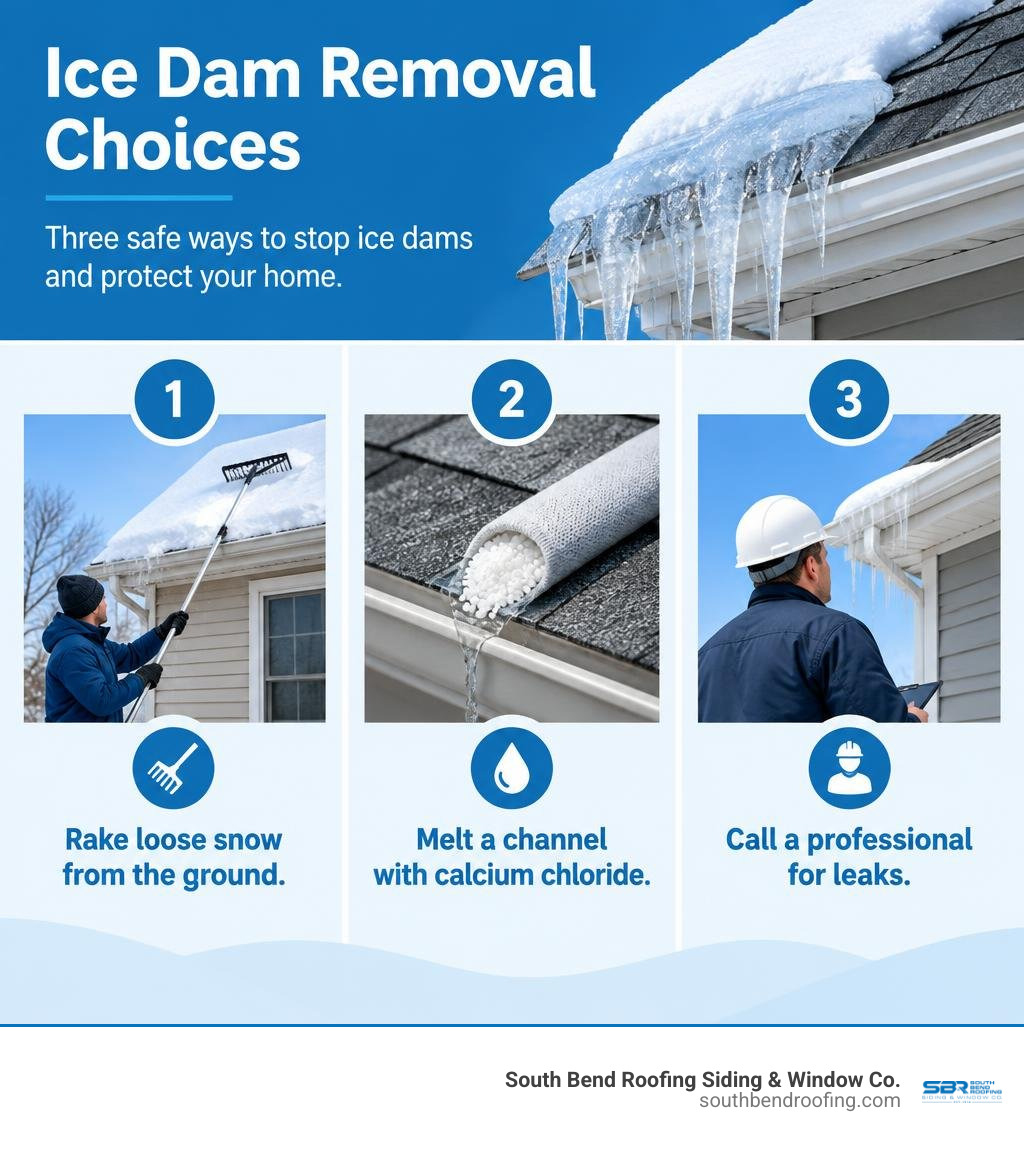
To get rid of an ice dam on a roof, start from the ground: use a roof rake to pull loose snow away from the roof edge. For a small dam, a sock filled with calcium chloride can melt a channel for water to drain. If water is leaking or you cannot place the sock safely, call a qualified roofing professional. Never climb onto an icy roof or chip at the ice.
Ice dams form when roof snow melts and refreezes at the colder edge. The ice traps water, which can seep beneath shingles and into your home.
I'm James Spillman, vice president at South Bend Roofing Siding & Window Co., which has served the region since 1914. My work with residential and commercial roofing in Indiana and Michigan guides these practical recommendations on how to get rid of an ice dam on a roof without putting people or roofing materials at risk.
Understanding Ice Dams: Formation and Warning Signs
When winter sets in across the Midwest, snow blankets our roofs. While a snowy rooftop can look picturesque, it often sets the stage for hidden damage. Understanding the mechanics of how ice dams develop is the first step toward protecting your home from water intrusion.
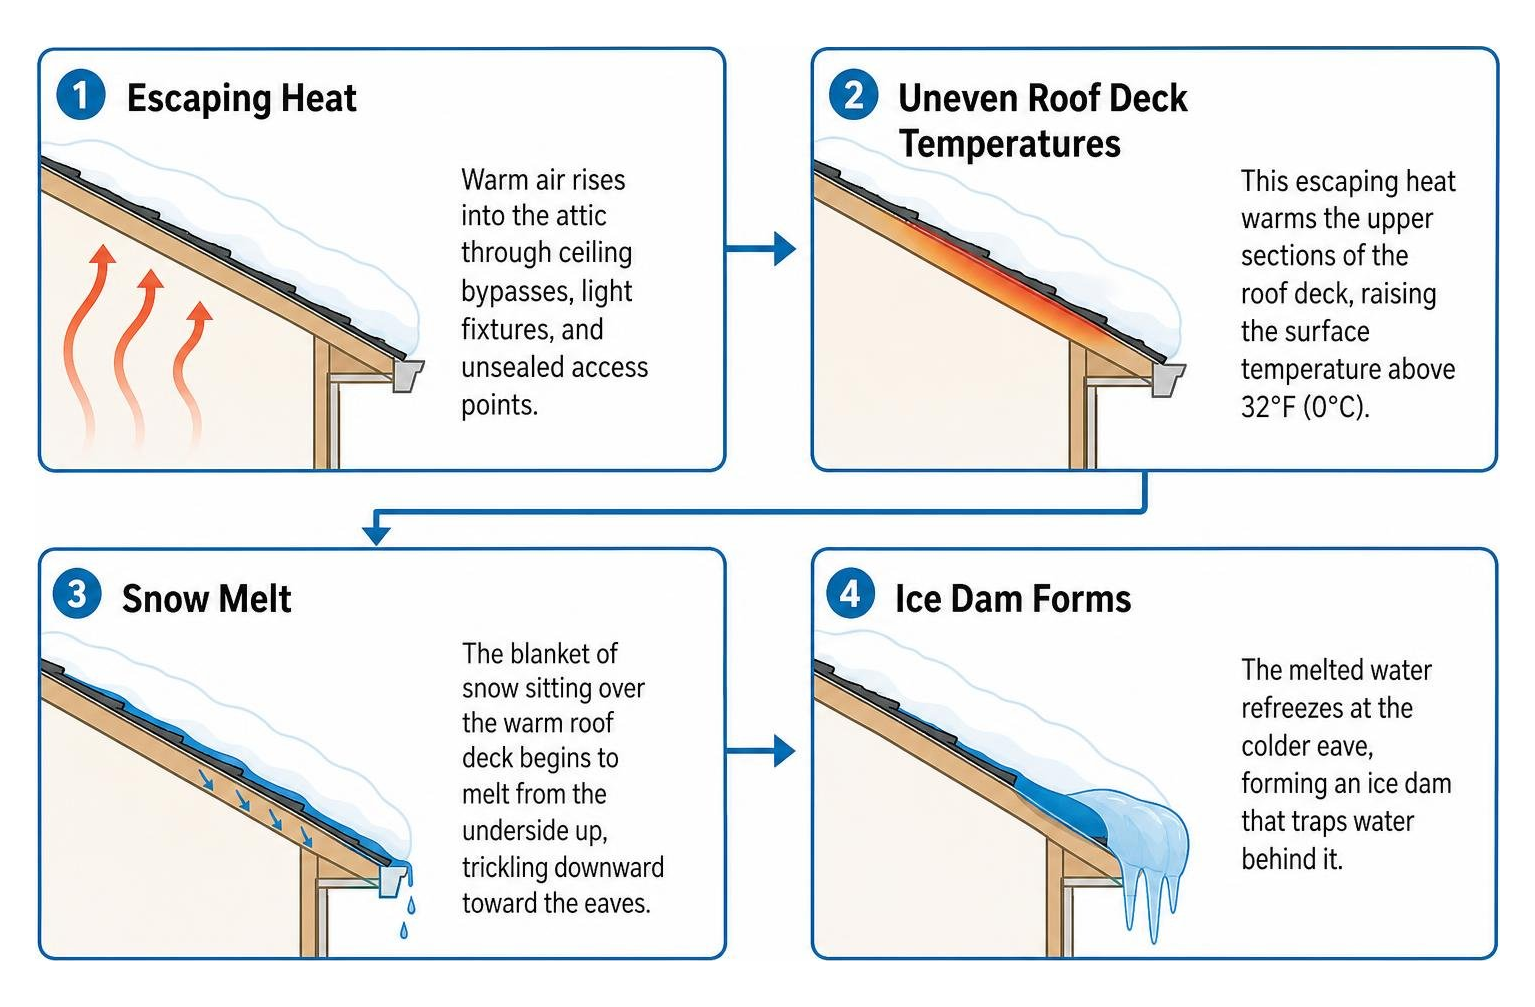
An ice dam is essentially nature's version of a traffic jam on your roof deck. The process begins inside your home:
- Escaping Heat: Warm air rises into the attic space through ceiling bypasses, light fixtures, and unsealed access points.
- Uneven Roof Deck Temperatures: This escaping heat warms the upper sections of the roof deck, raising the surface temperature above 32°F (0°C).
- Snow Melt: The blanket of snow sitting over the warm roof deck begins to melt from the underside up, trickling downward toward the eaves.
- Refreezing at the Eaves: The roof overhangs (eaves) extend past the exterior walls of the house and remain completely unheated, matching the freezing outdoor air temperature. When the meltwater hits these cold eaves, it freezes instantly.
- Dam Creation and Meltwater Backup: As this freeze-thaw cycle repeats over several days, a thick ridge of solid ice builds upward. Meltwater flowing down from above can no longer run off into the downspouts. Instead, it forms a trapped reservoir of liquid water that backs up beneath your asphalt shingles, soaking into the roof decking, ceilings, and exterior walls.
Early identification helps prevent expensive structural repairs. Reviewing resources on spotting and managing winter ice dams highlights common warning signs to monitor throughout the winter:
- Massive Icicle Formations: While small icicles are common, thick, heavy icicle clusters extending along the entire eave line or hanging directly from the fascia are a prime indicator that meltwater is refreezing.
- Ice Buildup Behind Siding or Soffits: If you see ice emerging from underneath your soffits or behind exterior wall siding, water has already penetrated past the outer roofing boundary.
- Uneven Snow Melt Patterns: If large patches of bare shingles appear on the upper roof while a thick bank of hard snow and ice remains locked at the roof edge, severe temperature differentials are actively feeding an ice dam.
- Interior Water Stains and Peeling Paint: Dark water rings on upper-floor ceilings, moisture spots around recessed lighting, or bubbling paint along exterior-facing walls mean backed-up water is finding a path inside.
- Damp Attic Spaces: Inspecting your attic after heavy snow may reveal wet roof decking, frost buildup on roofing nails, or damp spots on structural framing.
Addressing an ice dam early prevents moisture from rotting your roof deck or damaging your interior finishes.
Proven Ice Dam Removal Methods
When you discover an ice dam, immediate mitigation is necessary to relieve trapped water before it enters your home. Choosing the right method depends on the thickness of the ice dam, whether water is actively leaking inside, and whether the roof edge can be reached safely from the ground.
To help you decide between tackling the problem yourself or calling in a crew, here is a direct comparison of the two safest options for eliminating an ice dam, based on industry guidelines for safe ice dam removal methods:
| Feature / Factor | DIY Calcium Chloride Sock | Professional Low-Pressure Steam |
|---|---|---|
| Primary Goal | Melts an emergency drainage channel | Completely eliminates the entire ice dam |
| Average Cost | Minimal, budget-friendly DIY materials | Higher investment; varies by roof size and ice thickness |
| Time to Results | 12 to 48 hours for full channel creation | 2 to 4 hours for complete removal |
| Safety Level | High (if deployed from the ground) | Highest (performed by certified specialists) |
| Shingle Risk | Very low (chemically safe for roofing) | Zero risk (low pressure preserves shingle granules) |
| Best Used For | Minor ice dams without active interior leaks | Thick dams, large roofs, or active ceiling leaks |
DIY Calcium Chloride Sock for Emergency Drainage Channels
If you are dealing with a localized ice dam and do not have an active interior ceiling leak, creating an escape channel with calcium chloride is an affordable, effective DIY technique. A standard bag of calcium chloride will easily fill 13 to 15 long tube socks or nylon stockings.
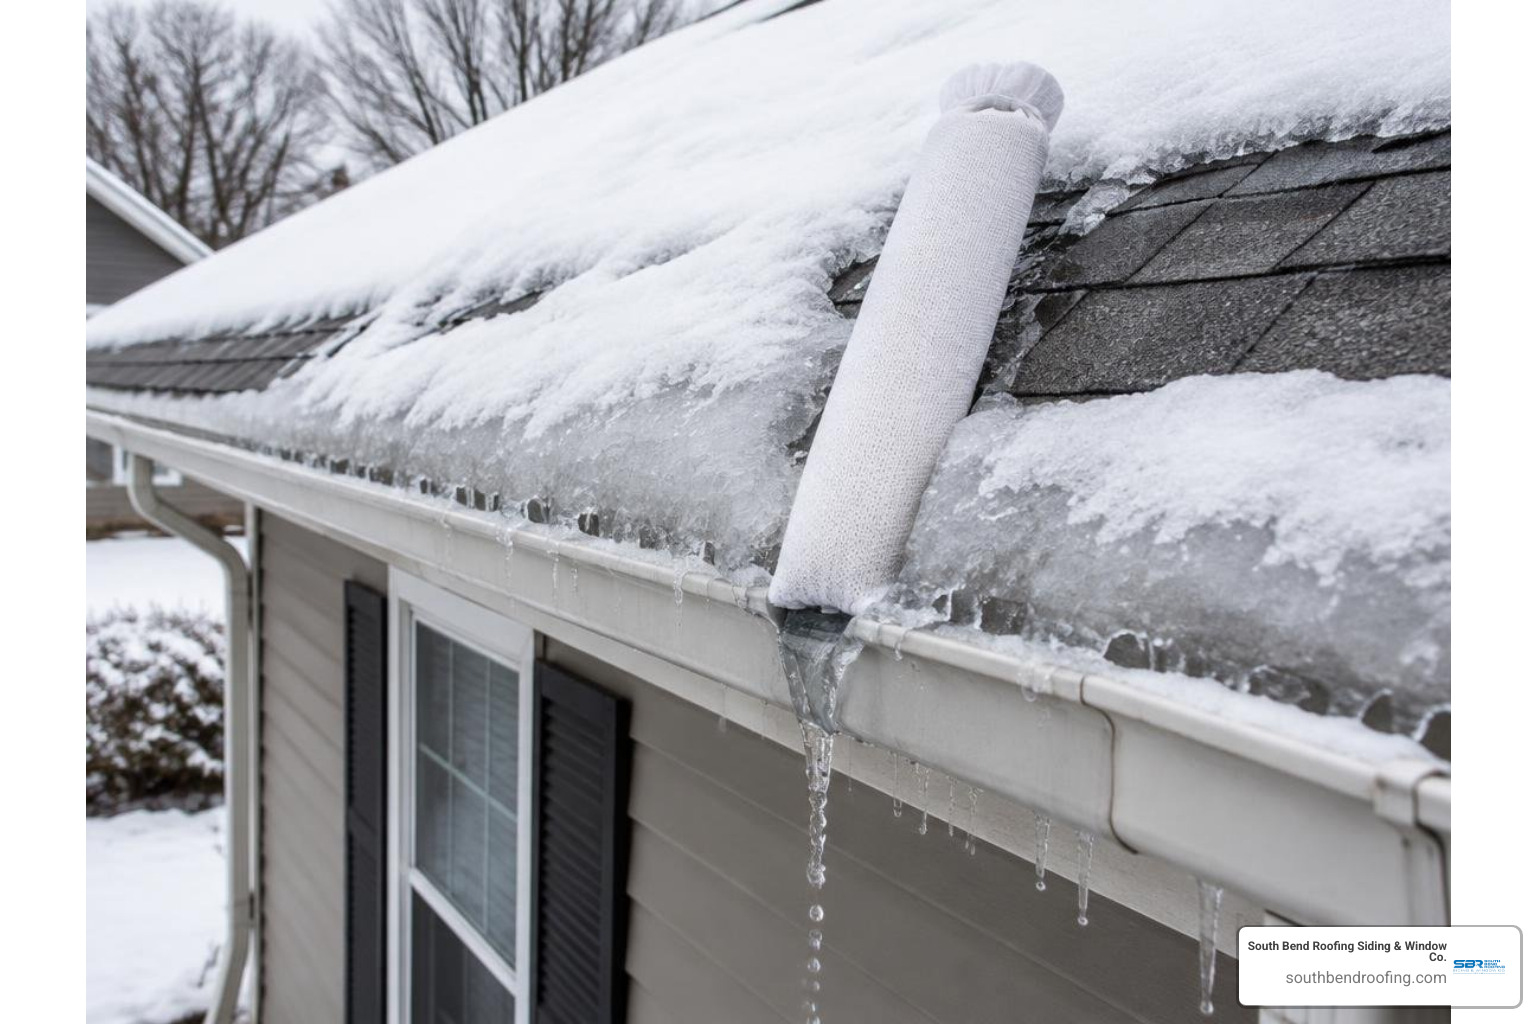
Here is how to properly prepare and apply a calcium chloride deicing sock:
- Clear Loose Snow First: Use an extendable roof rake with a plastic edge while standing firmly on the ground. Pull down the loose, powdery snow from the lower 3 to 4 feet of the roof edge. Removing this upper snow stops feeding water to the dam while you work. Never rake down to bare shingles with excessive force.
- Fill the Sock: Take a clean, long tube sock or the leg of an old nylon stocking. Pour calcium chloride ice-melt granules inside until the sock forms a cylindrical shape roughly 2 to 3 feet long. Tie off the open end securely with string or an overhand knot.
- Position the Sock Vertically: Lay the filled sock across the top of the ice dam so it crosses the ridge perpendicular to the roof edge. One end should rest in the open area above the dam, while the other hangs slightly over the edge. If you have a single-story home, you can position the sock using an extension pole from the ground or from a securely positioned step ladder placed on flat, cleared pavement. Never climb onto an icy roof.
- Allow the Channel to Melt: Calcium chloride generates an exothermic (heat-releasing) chemical reaction as it absorbs moisture from the ice. Over the next 12 to 48 hours, it will melt a clean, vertical channel directly through the ice barrier.
- Relieve the Trapped Water: Once the channel cuts completely through the dam, the pool of backed-up meltwater will drain harmlessly off the roof, eliminating the hydrostatic pressure forcing water under your shingles.
- Protect Ground Landscaping: As the meltwater runs off, calcium chloride runoff can occasionally stress sensitive foundation plants. Lay a light tarp over shrubbery directly beneath the eave, and rinse the soil near the downspouts once warmer weather arrives.
Professional Steaming for Safe Ice Removal
When an ice dam is massive, spans the entire length of your roof, or is already causing water to drip through your ceilings, DIY chemical socks work too slowly. In these cases, hiring a professional roofing contractor equipped with dedicated low-pressure steam equipment is the safest and most effective solution.

Trained roofers use specialized, purpose-built steam machines that operate at high temperatures (250°F to 300°F) but very low water pressure (typically 100 to 250 PSI). Unlike abrasive mechanical tools or high-pressure washers, low-pressure steam gently vaporizes and cuts through solid ice without stripping asphalt shingle granules, loosening seams, or cracking cold materials.
When you contact our team for residential roofing services, a professional steam removal process follows rigorous safety and preservation standards:
- Safety and Fall Protection: Our technicians secure OSHA-compliant ropes and safety harnesses before accessing necessary roof elevations, eliminating personal fall hazards.
- Snow Clearing: Technicians carefully shovel away loose surface snow down to the ice dam to expose the frozen mass.
- Strategic Slot Cutting: Using the specialized steam wand, the technician cuts vertical relief slots into the ice dam every 12 to 18 inches, dividing the large ice sheet into smaller, manageable blocks.
- Undercutting and Removal: The roofer gently directs steam beneath the ice chunks, releasing their bond with the roof deck. The loosened ice blocks are safely lowered or slid off the roof.
- Drainage Clearance: The crew clears ice blockages around the roof edge and drainage paths so future snow melt can drain away unimpeded.
Professional steam removal typically takes between 2 and 4 hours depending on roof pitch and ice thickness, restoring proper drainage and ending roof leaks on the spot.
Dangerous Practices to Avoid During Roof Ice Removal
When faced with water dripping into a living room or bedroom, homeowners often reach for aggressive tools in a desperate attempt to break the ice. Unfortunately, well-meaning DIY removal attempts often cause far more structural damage than the ice dam itself.
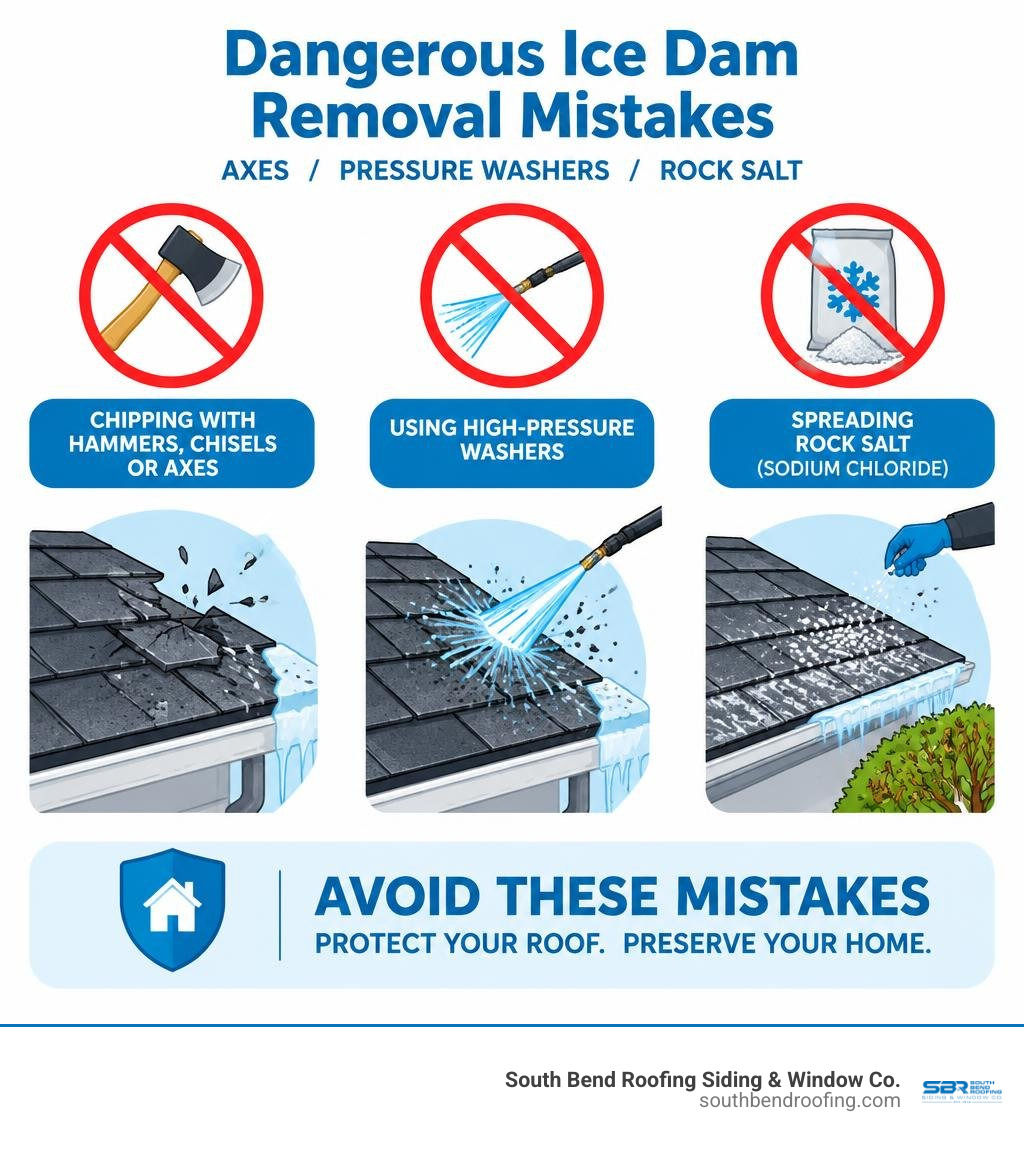
Avoid these hazardous practices during winter roof maintenance:
- Chipping With Hammers, Chisels, or Axes: Striking an ice dam with an axe, pick, pry bar, or claw hammer is one of the fastest ways to destroy a roof. In sub-freezing temperatures, asphalt shingles become brittle. A hammer blow easily shatters the frozen shingles beneath the ice, punctures the wood roof decking, and tears the underlying waterproof underlayment.
- Using High-Pressure Washers: Some contractors attempt to cut ice using standard hot-water pressure washers operating at 2,000 to 4,000 PSI. This high pressure acts like a sandblaster against frozen asphalt shingles, stripping away the protective mineral granule coating. Granule loss leaves the asphalt core exposed to UV degradation, causing premature shingle failure and voiding the manufacturer's warranty coverage.
- Spreading Rock Salt (Sodium Chloride): Rock salt is designed for concrete driveways, not residential roofs. Sodium chloride is corrosive to metal flashings, roofing nails, and valley liners. Furthermore, as the salty brine runs down the roof, it leaves behind white mineral staining on shingles, corrodes exterior fasteners, and kills foundation shrubs and grass beds below.
- Pouring Boiling Water Over the Ice: Dumping buckets of hot water onto an ice dam provides a brief burst of melting, but the vast majority of that water quickly cools and refreezes as it reaches the cold eaves. This adds volume to the existing ice dam, worsening the problem.
- Walking Across an Icy Roof: Walking on a snow-covered, sloping roof without specialized safety equipment and fall arrest harnesses is dangerous. Hard-packed snow conceals slick, transparent sheet ice, making slips and serious falls a significant risk.
When physical impact or inappropriate chemicals ruin your roofing system, simple repairs are no longer an option. Homeowners facing severe deck rot or structural puncture damage often have to invest in comprehensive roof replacement and tear-offs to strip ruined materials down to the structural sheathing and install a sound roofing system.
Frequently Asked Questions About Roof Ice Dams
Does homeowners insurance cover ice dam removal or resulting interior damage?
Understanding insurance coverage for ice dam water damage is essential when dealing with winter roof leaks. Standard homeowners insurance policies (such as an HO-3 policy) generally provide coverage for sudden, accidental interior water damage caused by ice dams. This includes repairing water-stained ceilings, damaged drywall, ruined hardwood flooring, and soggy attic materials.
However, most insurance providers consider the physical removal of the ice dam itself to be routine home maintenance. Consequently, policies rarely reimburse the direct cost of hiring an ice dam steaming crew.
If you discover an active ceiling leak caused by an ice dam, take the following steps:
- Place buckets under active drips and move furniture away from the affected area.
- Photograph all interior water damage, saturated personal property, and the ice buildup on your roof.
- Call a roofing professional immediately to remove the dam and halt water intrusion.
- Keep all receipts and invoices from emergency mitigation services, and contact your insurance agent to initiate a claim within 24 to 48 hours.
Why should rock salt never be used on a residential roof?
Rock salt (sodium chloride) should never be applied to a residential roof for several reasons:
- Shingle Degradation: The harsh chemical composition of sodium chloride dries out and degrades the asphalt binder within shingles, causing them to curl, crack, and lose their waterproofing properties.
- Corrosion of Metal Components: Sodium chloride brine corrodes metal valley flashings, step flashing around chimneys, aluminum drip edges, and the galvanized nails holding your roof deck together.
- Interior Salt Damage: If water has already penetrated your roof deck, salty meltwater dripping into your attic will leave corrosive salt deposits on structural wood framing, electrical boxes, and drywall.
- Destruction of Lawn and Landscaping: When rock salt washes off your roof, the concentrated saline solution drains into the soil around your foundation, burning roots and killing perennial plants, shrubs, and grass.
Always use calcium chloride deicing products specifically formulated for residential roof applications.
What long-term roofing solutions prevent ice dams from recurring?
While emergency steaming and calcium chloride socks resolve active ice dams, eliminating them permanently requires addressing roof deck temperatures and moisture barriers.
Long-term strategies include:
- Ice and Water Barrier Membranes: When installing a new roof, certified roofers install a self-adhering, waterproof membrane (such as an ice and water barrier) directly onto the wood decking along all eaves, valleys, and roof penetrations. This rubberized membrane seals tightly around roofing nails, creating a watertight barrier that prevents standing meltwater from penetrating the home even if an ice dam forms.
- Air Sealing the Attic Deck: Preventing warm interior air from leaking into the attic is critical. Sealing air bypasses around attic access hatches, drop-down stairs, recessed ceiling lights, plumbing vent pipes, and chimney chases keeps the attic space cold.
- Proper Roof Deck Ventilation: A balanced system of continuous soffit intake vents and ridge exhaust vents ensures a steady stream of cold outdoor air circulates beneath the roof deck. This airflow carries away residual heat, maintaining a uniform roof temperature that matches the eaves and stops snow from melting unevenly.
- Snow Raking Routine: Using an extendable roof rake to clear fresh snow from the bottom 3 to 4 feet of your roof after major snowstorms removes the fuel that feeds ice dams.
Homeowners can explore our educational roofing blog for additional insights on seasonal maintenance and structural roof preservation.
Protecting Your Roof Through Every Midwest Winter
Ice dams can transform a peaceful winter snowfall into a stressful home emergency. Left unaddressed, the water trapped behind an ice dam can quickly work its way beneath shingles, saturating roof decking, ruining ceilings, and creating mold within living spaces.
By prioritizing safety, steering clear of damaging tools like hammers and rock salt, and relying on proven solutions like calcium chloride socks or professional steaming, you can resolve ice buildup without putting your home at risk.
When you need an honest assessment of your roof's condition, our experienced team is here to help. At South Bend Roofing Siding & Window Co., we have protected homes and commercial properties across Northern Indiana and Southwest Michigan for more than 110 years. Our certified roofing specialists provide thorough evaluations and dependable solutions, whether your roof needs a targeted repair to extend its service life or a complete tear-off and replacement.
If you have questions about winter roof damage, seasonal maintenance, or want to verify your warranty coverage, our knowledgeable team is ready to assist. Contact us today at (574) 288-4764 to schedule your free roof inspection and written estimate.