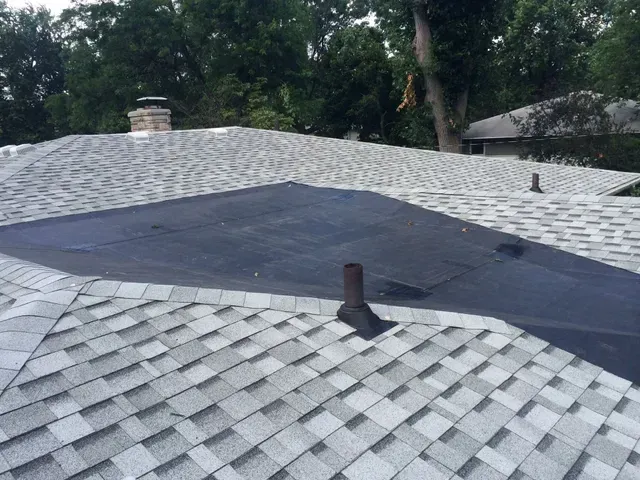
Why Membrane Roofing Installation Starts With the Roof Deck
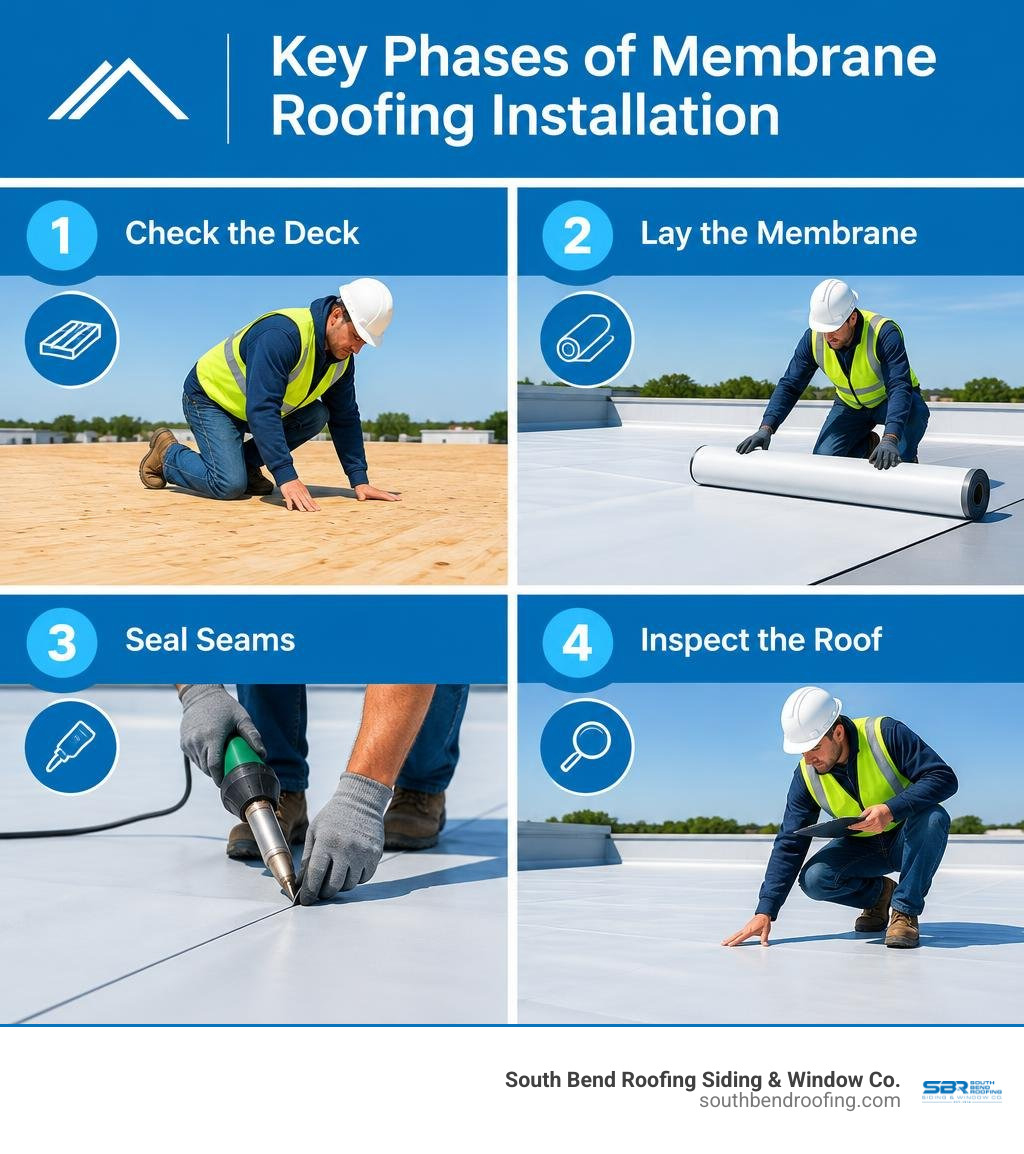
Good membrane roofing installation starts before the first sheet is laid. Check that the roof deck is sound, dry, clean, and sloped to drain. Then lay the membrane as the manufacturer directs, secure it, seal every seam and roof opening, and inspect the finished surface for gaps or trapped air. Skipping those checks can leave a path for water and lead to costly repairs.
I'm James Spillman, Vice President at South Bend Roofing Siding & Window Co. Our team has worked on roofs since 1914, and I help oversee residential and commercial projects, including membrane roofing installation.
Critical Substrate Preparation and Readiness Requirements
Every resilient membrane roof relies entirely on the structural foundation beneath it. If the substrate beneath a commercial or low-slope roof is compromised, damp, or uneven, the membrane above will inevitably fail prematurely. Quality installation begins by verifying that the deck provides continuous support, proper fastening strength, and adequate drainage slopes.
Flat and low-slope roofs are engineered to shed water toward internal drains, scuppers, or perimeter edges rather than allowing water to collect indefinitely. Industry standards dictate a minimum finished fall of 1:80 (approximately 0.7 degrees) across general roof fields and decks. Primary drainage channels require a minimum fall of 1:100 (approximately 0.6 degrees). While modern elastomeric and modified bitumen systems tolerate standing water for brief periods after heavy rainfall, water ponding for longer periods accelerates surface degradation, attracts debris, and stresses structural load capacities.
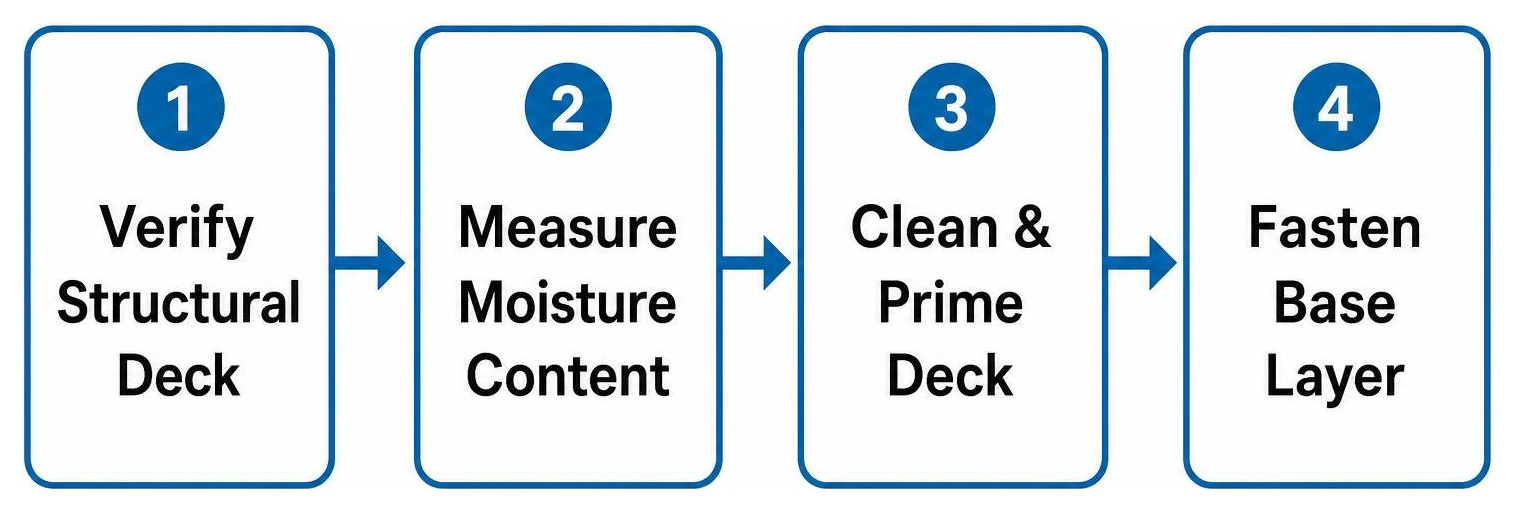
Before unrolling any roofing materials, contractors must thoroughly sweep and vacuum the substrate to clear dust, oil, sharp fasteners, and debris. Any voids, depressions, or joint steps greater than 3mm must be filled or planed flush to prevent punctures under foot traffic. For systems requiring liquid primers, products like Nuraflux Primer should be evenly applied at a coverage rate of roughly 5 square meters per litre, allowing adequate drying time before laying self-adhesive or torch-applied sheets.
Evaluating Decking and Substrate Moisture
Moisture trapped underneath a newly installed membrane is one of the most common causes of large blisters, organic rot, and premature delamination. When sunlight warms the roof surface, trapped liquid expands into pressurized vapor, forcing the membrane away from the underlying deck.
- Plywood and Timber Substrates: For standard roof applications, plywood decking should be treated and maintain a minimum thickness of 17mm, supported at maximum 600mm centres. For traffic-bearing decks, thickness must increase to at least 21mm. Plywood sheets must be laid with staggered joints and fastened securely to prevent edge deflection.
- Concrete Substrates: Poured-in-place or precast concrete decks must cure fully and register a moisture content of less than 5% before primer or membrane application. Installing over green or wet concrete traps moisture within the building envelope, compromising adhesive bonds.
- Existing Decks & Tear-Offs: During comprehensive re-roofing projects, the entire assembly must be stripped down to the structural deck. This allows installers to examine wood boards, metal pans, or concrete slabs for structural integrity, replacing rotted decking and reinforcing loose nailers.
Essential Safety Protocols During Membrane Roofing Installation
Membrane roofing demands rigorous jobsite safety protocols, particularly when working at elevated heights and handling high-temperature heating equipment or specialized bonding adhesives.
- Fall Protection: Install certified perimeter guardrails, safety netting, or secure personal fall arrest systems with tested anchor points across the roof deck before staging materials.
- Torch and Thermal Safety: When applying torch-down systems, applicators must wear heat-resistant gloves, protective eye gear, long flame-retardant trousers, and sturdy, non-slip work boots (flip-flops and casual sneakers must never appear on a jobsite).
- Fire Prevention: Maintain fully charged, inspected Class A, B, and C dry-chemical fire extinguishers directly in the work zone. Conduct a formal fire watch on the roof deck for a minimum of one to two hours following the shutdown of all open-flame torches.
- Chemical and Adhesive Handling: Store liquid primers, solvent-based adhesives, and foam bonding agents within regulated temperature windows. High-foaming polyurethane adhesives, for instance, generally require ambient application temperatures between 5°C and 30°C. Keep open flames away from solvent vapors and ensure cross-ventilation around roof penetrations and intake louvers, adhering to manufacturer instructions such as the UltraPly™ TPO Membrane - Installation Instructions.
Step-by-Step Membrane Roofing Installation Process
Executing a dependable membrane roof requires systematic execution: laying vapor controls, anchoring base layers, and heat-welding or adhering seams with precision.
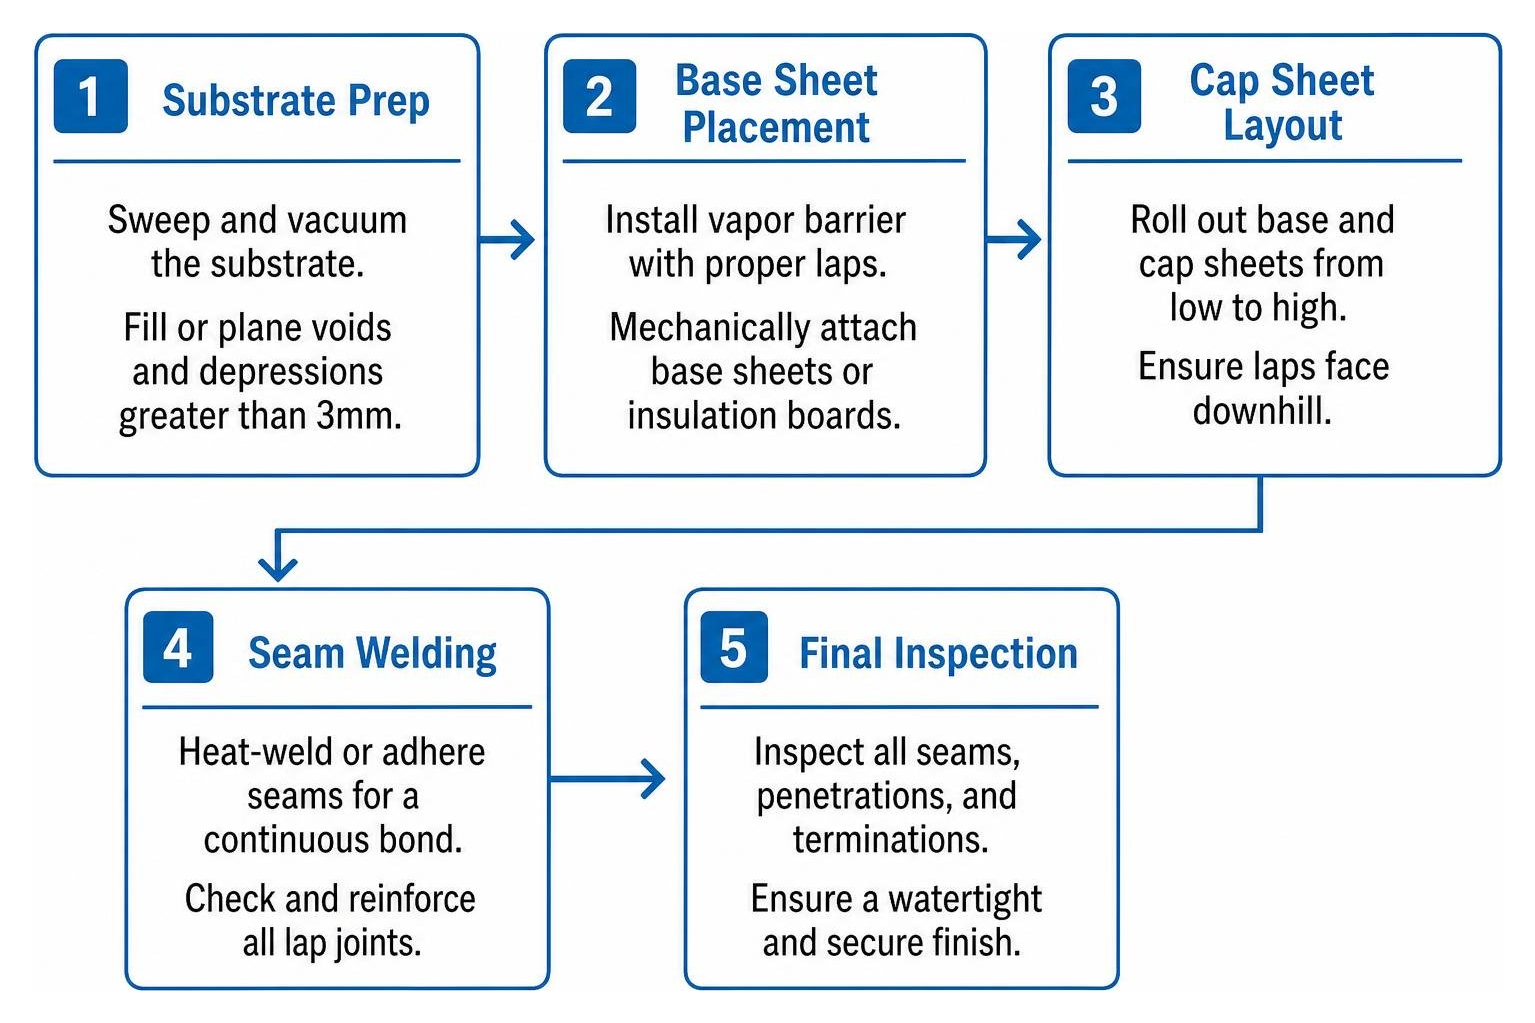
- Vapor and Air Barrier Installation: Align the vapor barrier over the prepared deck, maintaining minimum side laps of 76mm (3 inches) and end laps of 152mm (6 inches). Stagger end laps at least 305mm (12 inches) to eliminate intersecting four-corner seams.
- Substrate Attachment: Mechanically attach base sheets or cover boards using approved stress plates and corrosion-resistant fasteners. Fasteners are typically spaced 300mm (12 inches) along side laps and 450mm (18 inches) across staggered intermediate rows to achieve adequate wind-uplift resistance.
- Membrane Alignment: Roll out base and cap sheets starting from the lowest drainage points and working uphill. Ensure all lap joints face downhill so that shedding water flows freely across sheet transitions rather than driving against exposed seam edges.
- Thermal Considerations: For self-adhesive underlayments and modified base sheets, installation must take place when ambient and surface temperatures are at or above 10°C (50°F). If cold conditions cause adhesive tackiness to drop or condensation to form on metal decks, work should pause until surfaces are dry and warm.
Applying Base Sheets and Peel-and-Stick Systems
Peel-and-stick, self-adhesive base sheets provide clean, flame-free waterproofing. However, handling large, aggressive adhesive sheets requires careful control to prevent wrinkles, air entrapment, and misalignment.
There are two primary methods for unrolling and installing peel-and-stick membranes:
- Unroll First, Peel Later (The Split-Release Method): Position the full roll along your chalk line, ensuring all lap tolerances align. Once positioned, fold back one half of the membrane along its length (or peel the top section of a split-release backing film), tack the exposed adhesive corner securely to the primed substrate, and peel the backing release sheet away at a smooth 90-degree angle. Once the first half is bonded, repeat the process for the opposite side. Pulling the release liner at 90 degrees prevents the paper or film from tearing unevenly beneath the sheet.
- Peel While Unrolling (The Continuous Roll Method): Position the roll at the start of the roof run, strip back the initial 300mm to 500mm of backing film, anchor the lead edge firmly to the deck, and secure the corners using button-cap nails or weighted rollers. As one installer rolls the membrane forward along the guide line, a second worker pulls the release film steadily from underneath.
| Installation Method | Best Use Case | Primary Advantage | Key Risk to Manage |
|---|---|---|---|
| Unroll First, Peel Later | Long runs, windy days, split-release rolls | Maximum alignment control; prevents premature sticking | Liner tearing if pulled at sharp or improper angles |
| Peel While Unrolling | Wide, open spans; experienced two-person crews | Faster application on warm days | Creasing or wandering off the chalk line |
Installing the Cap Sheet and Heat Welding Seams
The cap sheet serves as the primary exterior defense against ultraviolet light, heavy weather, and physical abrasion. Standard high-performance modified cap sheets measure 4mm in thickness, 1m in width, and 7.5m in length, providing 7.5 square meters of gross coverage per roll with factory-applied mineral chip granules.
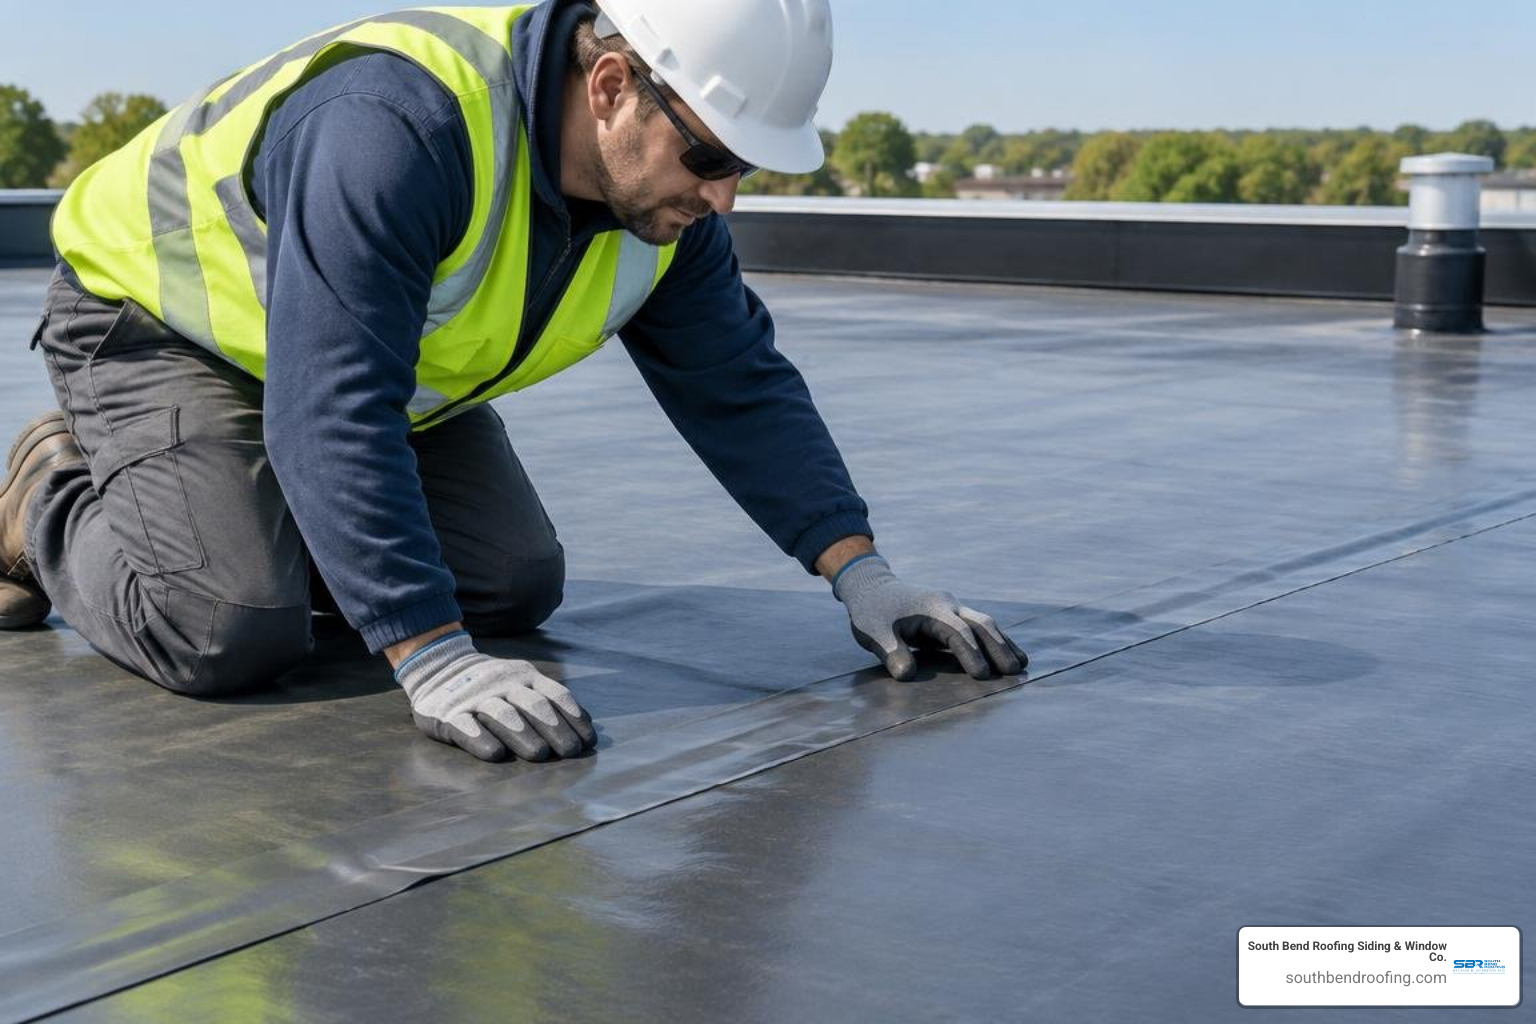
- Lap Dimensions: Align cap sheets with minimum 80mm side laps and 100mm end laps. Ensure end laps between adjacent rolls are staggered by at least 500mm to prevent aligned seam joints across the field.
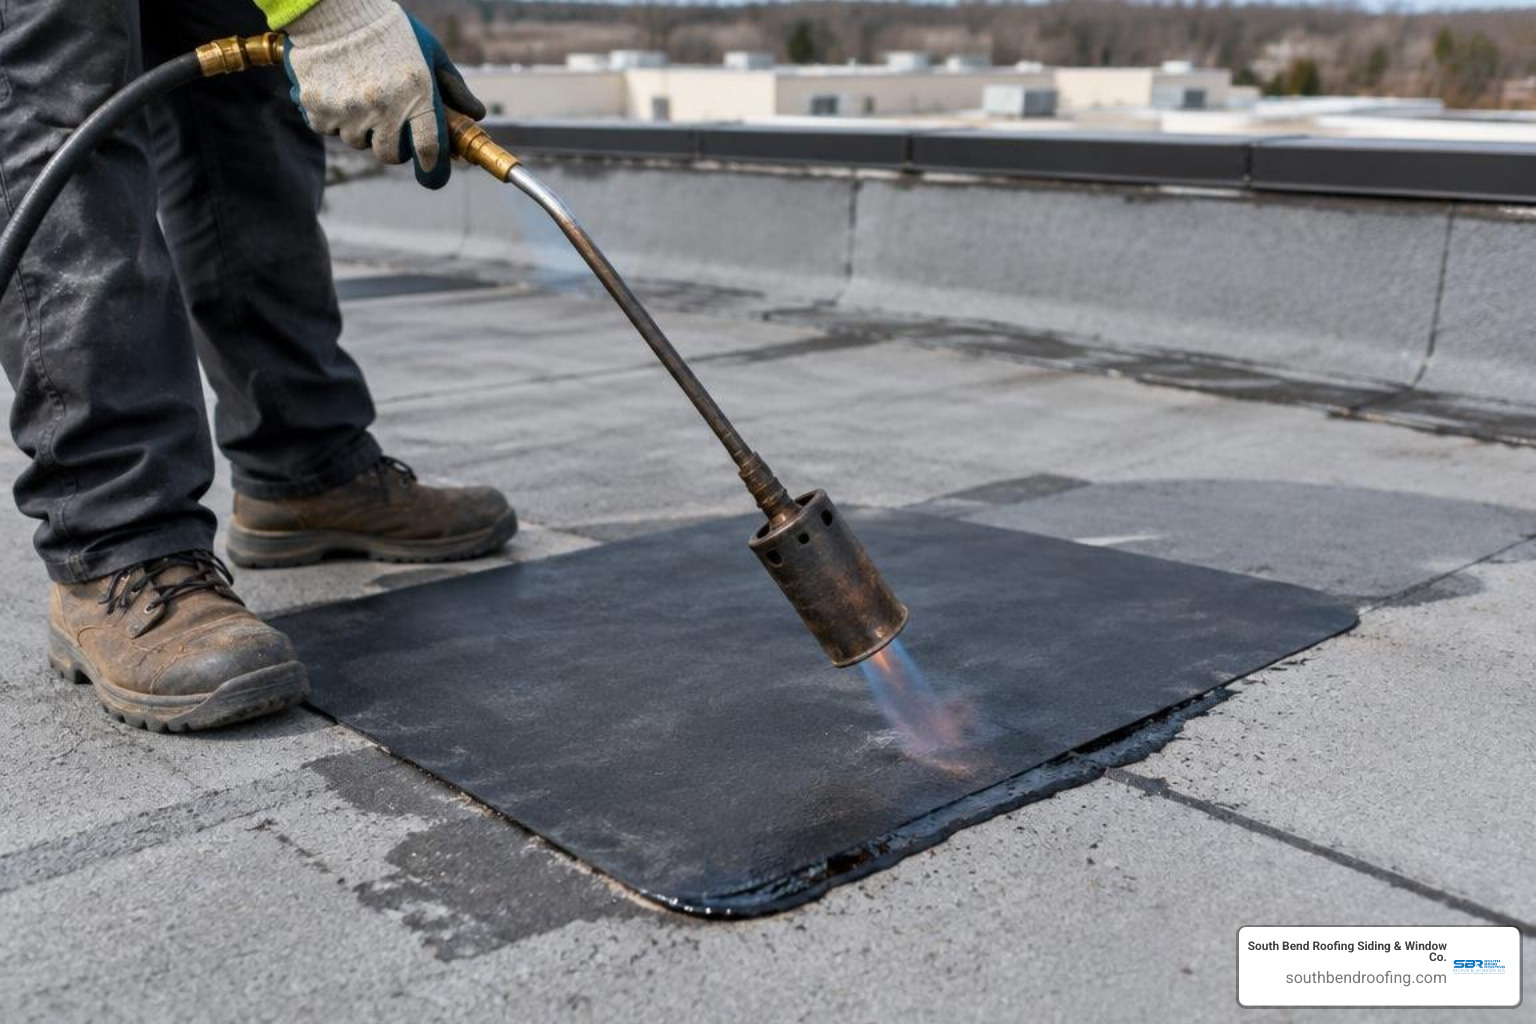
- Torch and Hot-Air Welding: When heat-welding modified bitumen or thermoplastic sheets, apply uniform heat along the lap joint until a continuous 3mm to 5mm bead of melted bitumen or melted polymer flows evenly from the seam edge.
- Seam Rolling: Immediately roll the heated seam with a steel or silicone hand roller, working from the inside edge outward to expel trapped air and embed the lap joint securely.
- Detailing and Penetrations: Turn up membrane sheets a minimum of 100mm to 150mm at parapet walls, curbs, and vertical abutments. Secure all penetrations with prefabricated pipe boots, target patches, and stainless-steel clamping bands sealed with commercial-grade polyurethane mastic.
Troubleshooting and Maintaining Membrane Roofs to Prevent Failures
Even high-performance commercial membranes can experience wear, physical punctures from dropped tools, or localized blistering caused by building movement and trapped moisture. Routine maintenance identifies small anomalies before water penetrates the underlying roof decking.
Resolving Blisters and Seam Issues in Membrane Roofing Installation
Blisters appear when air, solvent vapor, or water moisture expands beneath an unadhered membrane section under summer heat. Small, unbroken blisters that do not stress surrounding seams can often be left alone and monitored. However, large, expanding, or cracked blisters must be repaired immediately.
- Blister Incision: Carefully slice open the center of the blister using an x-acto or utility knife, forming a clean cross (X) cut. Fold back the four triangular flaps of membrane to expose the damp substrate beneath.
- Drying and Cleaning: Completely remove all moisture, dirt, and degraded adhesive using clean rags and a hot-air gun until the deck and membrane underside are bone dry.
- Re-Adhering Flaps: Apply a generous layer of compatible mastic, adhesive, or primer beneath the flaps, press them firmly back against the deck, and roll them flat.
- Patch Application: Cut a round or oval patch of compatible cap membrane that extends at least 100mm beyond the cut lines in all directions (round corners prevent edge peeling). Torch or hot-air weld the patch over the repair area, pressing it with a hand roller until a uniform bleed-out bead appears around the entire perimeter.
- Open Seam Resealing: For loose or unbonded lap seams, probe the joint with a rounded seam checker, clear out accumulated dirt or silt with solvent cleaner, dry the seam thoroughly, apply heat or adhesive, and firmly roll the seam flat.
Routine Maintenance and Inspection Schedules
A disciplined maintenance routine protects your roof investment and preserves long-term weatherproofing performance. Flat and low-slope roof systems should undergo comprehensive inspections at least twice a year—ideally in spring and autumn—as well as after severe weather events like hail, heavy windstorms, or torrential rains.
- Clear Drainage Pathways: Inspect internal drain bowls, leaf guards, scuppers, and downspouts. Clear leaves, silt, and foreign debris to prevent standing water accumulation.
- Inspect Flashing Details: Check perimeter gravel stops, parapet copings, counter-flashings, and mechanical curb seals for loose fasteners or cracked sealant.
- Verify Roof Cavity Ventilation: In cold-roof designs, ensure static vents (such as Nuravents, typically spaced every 20 square meters) remain unobstructed to maintain passive air circulation within the roof framing cavity.
- Check High-Traffic Zones: Examine areas around HVAC units, communication equipment, and access hatches for punctures, surface gouging, or dropped hardware.
For specialized assessments, property owners rely on our commercial roofing services for comprehensive facility maintenance, as well as our residential roofing services for low-slope residential additions, porches, and flat-roof architectural sections.
Frequently Asked Questions About Membrane Roofing
What are the two best methods for installing peel-and-stick membrane?
The two primary methods are the "unroll first, peel later" method and the "peel while unrolling" method. In the first approach, the membrane roll is fully laid out along chalk guidelines, aligned, and tacked at the corners before the split-release paper is peeled away from underneath at a 90-degree angle. In the second approach, installers strip the initial release liner, anchor the lead edge, and steadily pull the liner out from below while unrolling the sheet across the primed deck.
How do you repair bubbles or blisters in a roofing membrane?
To repair a blister, carefully cut an "X" into the raised bubble, peel back the flaps, and thoroughly dry the underlying deck. Once dry, coat the substrate with compatible adhesive or cold mastic, press the flaps back down, and apply a round cap-sheet patch that extends at least 100mm beyond the incision edges in every direction, heat-welding or rolling the edges watertight.
What substrate slope is required for proper membrane drainage?
Standard low-slope membrane installations require a minimum finished fall of 1:80 (about 0.7 degrees) across roof fields and decks, and 1:100 (about 0.6 degrees) along primary drainage channels. This positive slope ensures water moves continuously toward drainage outlets, preventing excessive ponding.
Conclusion
A high-performance membrane roof provides an exceptionally durable, watertight shield for low-slope and flat architectural structures. However, its long-term performance depends entirely on the care taken during installation: meticulous substrate preparation, dry decking, correct slope alignment, precise lap overlaps, and clean seam welds. Cutting corners on deck inspection or rushing seam adhesion creates vulnerable paths for water intrusion that can cost thousands in structural repairs.
When you need an experienced team to handle your low-slope or flat roofing project, contact our team. With 110+ years of local experience roofing since 1914, South Bend Roofing Siding & Window Co. provides free roof inspections, clear written estimates, and dependable manufacturer warranty coverage paired with our dedicated Workmanship Warranty. Whether your property needs targeted commercial repairs, full roof replacement, or expert guidance on single-ply PVC, TPO, or EPDM systems, schedule your professional roofing consultation by calling (574) 288-4764 today.